Wednesday, December 22, 2010

rear valance

Way back when I started tearing down the car, one of the first things to go was the rear valence. By "go" I mean I took it off the car, stuck it up on top of a high shelf, and moved on to the next bit. What I didn't do, was anything to repair the damage at the license place support - the car has obviously suffered some minor rear impact damage at some stage.


The license plate support bracket was twisted in the original impact, which must have been severe enough to bust the right side spot weld. Simply hammering it back into shape would have been very difficult if not impossible, so I decided to remove the bracket from the valance, straighten it out, and then weld* it back on.


The first step was to support the valence between two scrap 2x4's....


....and drill out the three remaining spot welds - which I accomplished with my new Eastwood spot weld cutter. I've read that some people drill an eighth inch pilot hole to guide the spot weld cutter, but I found making a mark with a center punch was good enough.


The photo below shoes how bent up the bracket was before I worked my magic.


Five minutes with a slab of metal plate and a body hammer, followed by grinding off the old spot welds with a three inch sanding disc on my die grinder, and the bracket was much straighter.


The valance was covered in minor dings and there were a few areas where the paint had bubbled up, mainly below the tail light mounting holes. I'm guessing that rain water gets inside the tail lights and takes a while to seep out leading to minor corrosion. I decided at this point to strip all the old paint off the valance before I welded the support bracket back on. I started with a can of standard paint stripper I had on the shelf in the garage. I've had a ton of experience of stripping paint off wood over the years, but this was completely different. The stripper really only made an impression in places where the paint was already peeling; scrubbing at the surface with a scotchbrite helped a little bit, but it was too much like hard work to do the whole valance that way...


...so I went to the local parts store and picked up a can of aircraft stripper. This stuff is expensive, but If I knew how well it was going to work I would have bought a bigger can - there will be a lot more stripping to do on this project in the future.


Starting at the left side of the valance this time I laid on a thick coating of stripper, left it for ten minutes or so, and then went over it with a body filler spreader. Most of the paint (and primer!) came off after the first application.


The stripper was a bright green color and the fumes were pretty awful, but it did work really well, so I'm not complaining.


After I was done with the stripper I cleaned up with Simple Green and some shop towels. The valance came out really nice, even if I do say so myself.


The inside was even easier to strip, as Ford only applied primer to this side, and some of that had already been eroded.


Once the inside was cleaned up it was time to get the body hammer back out.


I started reshaping the valance at the left side of the license plate bracket where there was the most damage.


This was reasonable easy to fix, and I think I did a good job of getting the valance to look the same as the undamaged area at the other side.


The lower edge was deformed most of the way along from a multitude of impacts over the years, but fortunately the metal wasn't torn or cracked so it was relatively easy to straighten it out.


There. Not quite perfect, but as good as I can get it without using body filler. I probably will use some filler later on, but due to the flexible nature of the valance, I think applying filler and sanding will be easier once the valance is back on the car.


The next step is to plug weld the bracket back on to the valance, and then give it a coat of red oxide epoxy primer before I mount it back on the car in preparation for the body filler marathon that is currently in the distant future. For now, the two pieces are going in the "need to weld*" pile.


(*I'm hoping that Santa Claus is going to bring me a MIG welder).

Update 2011-01

It's been a few weeks since I worked on the rear valance, so I started off by wet sanding to 120 grit on the outside - this gave a nice shinny finish all ready for primer.


Then I clamped the license plate support in place...well, that's what I wanted to do, but I don't have any clamps or vice grips big enough! So I used some masking tape to align the support instead...(note to self: buy some decent clamps!!)


And then I wedged the support against the edge of the workbench and clamped the valance to the bench. Hardly the ideal set up, but it was just about good enough to hold the support where I wanted it while I laid down a couple of very small tack welds.


The tack welds destroyed the tape - not a pleasant smell!

Then, using a piece of copper as a heat sink, and a wooden wedge, I was able to properly weld the support to the valance one plug at a time. Far from a perfect solution, but it worked without burning holes through the support bracket.


Not too bad, for a MIG novice


Cleaned up on the outside...

...and on the inside and now all ready for epoxy

Thursday, December 2, 2010

rear suspension

The choice of which rear suspension to get was relatively easy as one of the main targets of this project was to improve the handling of the car - along with better brakes, better steering and a BIGGER engine. I knew I wanted to lower and stiffen the rear suspension, and, after consulting several of the guys in BAMA, and doing my own research, I decided to replace the stock 4-leaf standard eye suspension with a set of 4.5-leaf mid eye springs. This should lower the car about an inch from the stock height. I'll be lowering the front by at least the same amount in due course.

First up was a refurb of the axle mounting plates. I could have bought replacements, but my approach on this project has been to reuse as many of the original parts as possible. Bearing in mind the rusted up condition of the plates, and how much of them will be seen when the rear suspension is assembled, I decided this would be another opportunity to use the POR-15 I talked about here.

The rusted mounting plates as they came off the car

The first step was to give the mounting plates a good going over with Metal Ready, which I plastered on with an old paint brush, and then neutralized/rinsed off with cold water. I then dried the plates first with compressed air and then with a heat gun to make sure they were really dry. I actually carried out this process twice because there didn't seem to be much difference in the color of the metal after the first application. Second time around there was a noticeably grayer/bluer hue as shown below.

The plates took on a grayish/blue hue after rust treatment

With the plates very, very dry it was straightforward to apply the POR-15 with a small foam brush as I did before...


...and then hang the parts up to dry. I waited about three hours until the first coat was touch dry and then applied a second coat, which I left to cure.


After several days the surface was hard with a glossy texture that was a perfect match for the rear end housing and brake backing plates I painted previously.


So, now it was time to purchase the chosen rear suspension...but where to buy it from? If you read my rant about Mustangs Plus from a couple of months ago, then you're probably expecting me to have placed my order somewhere else - and I did really try to do that. But then I started looking at prices and the cost of shipping. Let's face it, a pair of leaf springs weighs a lot, and shipping across the country is not cheap. Ultimately I decided to give MP another try, and here's why:
  • They have easily the best price on the springs I wanted.
  • Their suspension kit includes the rubber eye bushings, u-bolts, a shackle kit and all the hardware you need to fit the springs (I was only too happy to toss my original rusty hardware in the trash!).
  • MP is close enough to my house that I can drive out there and save on shipping...and check all the parts are correct before coming home.
  • At the same time I could pick up a pair of sub-frame connectors - another very expensive item when it comes to shipping.
The only negative to all this was finding the time to make the trip out to Stockton. I struggled to find an opportunity for a couple of weeks, but then my birthday ticked round and I gave myself the morning off from real life to make the journey. As it turned out it was a beautiful day for a drive.

Returning from Stockton in perfect driving weather

Attaching the suspension was really just the reverse of taking the old one off. I started by bolting the front spring eyes onto the brackets in front of the wheel wells. I tightened the locking nuts to a moderate level but didn't crank them down all the way just yet.


The new mid-eye suspension looked really sleek next to the rusty old stock springs which are still cluttering up my garage. What does one do with a pair of unwanted leaf springs? It's not like I can sell them!

Want to buy some used leaf springs? Yours for $1.00!!

I positioned the mounting plates, U-bolts and the correct size socket ready for attachment to the rear axle.

U-bolts at the ready - socket just out of shot
 
Then I moved the axle behind the car and rested it on a pair of jack stands. I used a tape measure to line the springs up as close to the perfect position as I could. I then raised the axle on the floor jack and moved it forward until the axle was directly above the spring attachment points. This was tricky to do because I was supporting the axle under the differential...and that's not exactly in the middle. It was very useful to have my Dad around to provide an extra pair of hands, although I'm quietly confident I could have managed the operation on my own.

 
With the axle in prime position I raised the driver side spring and supported it on a step stool. I then fitted the U-bolts over the axle, slotted on the mounting plate and tightened the nuts until the thread at the end of the U-bolts was just through the nuts.


After moving to the passenger side and repeating the procedure, I lifted the axle a few more inches with the floor jack and bolted on the shackles. I forgot to photograph the standard rubber bushings which were supplied with the spring mounting kit. I did consider upgrading to polyurethane bushings, but in the end I decided I didn't want the suspension to be that stiff. I also fitted a new pair of gas shock absorbers - this was where an extra pair of hands was particularly useful.


Sliding on the brake drums was not exactly straightforward - quite a bit of adjustment of the shoes was required before the drums would fit. At some point in the future I will be getting an expert to check over my work - probably after I have reinstalled the master cylinder and the brake lines....you can't be too careful when it comes to the brakes.

Nice shinny brake drum and axle studs
 
Here's a close up view of my new suspension and refurbished axle. After I took this picture I added the second quart of gear oil to the differential...via the breather tube bolt hole. Not exactly an orthodox procedure, but it did the trick. 

The sparkling view under the rear of the car
 
This picture is taken from further away. The main purpose of including it is for comparison with the picture below...

Now...
 
...which was taken before I removed the stock rear end. This seems a very long time ago now.

...and Then

I'm very grateful to Terry D. from BAMA for donating a set of 5-lug rims and tires to my project. Long term I have my eye on a set of Magnum 500's (yes, I know they weren't available on the Mustang until the '69 model year, but I really like them), but these wheels are perfect for now. Wheels and tires will probably be one of the last things I buy for the car. When I first picked up these wheels they had been stored outside for a while and were covered in rust on the inside surface of the rims. After several months storage in my garage I'm please to say that the rust was...well...still there. Fortunately my Dad stepped up to the plate and broke out the wire wheel and the drill and gave the rust a good going over. After he finished the first two wheels I mounted them on the axles, raised the rear of the car another inch on the floor jack and...for the first time since the summer...removed the jack stands. After I let the car back down there was just enough space for me to wriggle underneath and torque down the axle U-bolts and shackles until the suspension was completely secure.


I'm not sure if it's just because the suspension is lower than it used to be, or if it's because the rear of the car has been up in the air so long, but the back looks incredibly LOW. It's not really evident in the picture below, but the '68 actually looks like a drag car with the front noticeably higher than the rear.

Interestingly, I started working on the car properly almost exactly a year ago, although I had owned it for about fifteen months before that. I'm really pleased with my first year's work, and if I do as well in the next twelve months I'll be delighted. The next time I'm in the garage I'll be moving on to the passenger compartment, but for now I'm taking some time out to admire my progress.

One year on from the start of the tear down

Wednesday, December 1, 2010

rebuilding the rear axle

It's been a few weeks since my last post, and a lot has happened - although most of it has happened outside the garage! When I left off, after reattaching the trunk lid, I was just a rear axle and suspension away from being able to roll the car in and out of the garage at will.  However, although I bought and refurbished an eight inch rear end (see the links to part one and two of this story if you've not familiar), I was struggling to make a decision on what to do about the third member. Ideally I would like a posi unit with a 3.50:1 ring gear ratio, but the carrier I have came with a less desirable open unit with a 3:00:1 ratio.

And that's where the dilemma began. One option was to buy a complete refurbished third member...$$$...or I could spend even more $$$ on having the one I already own modified. I feel like changing the pinion and differential should be cheaper than buying a complete unit, which just goes to show why I never did very well at economics. Balancing this against the need to get the car back rolling asap, I put the decision to one side and started cleaning up the stock 7.5 inch/4-lug rear I took out of the car in the summer. Although I removed the drum brakes, I never felt the need to pull the axles, and the housing has been sitting on the garage floor ever since.

As it stood, with a thick oily coating of DIRT

Take a look at it in close up - absolutely covered in half an inch of dried on muck. It's probably never been cleaned since the day it left the assembly plant in March 1968.


I just could not bear to put it back under my lovely clean chassis in this state, so I devoted 20 minutes or so to chiseling off the dirt with a paint scraper and a flat blade screwdriver. The picture below doesn't really do justice to the amount of grot I had to remove.


I then gave the entire housing a going over with a warm solution of Marine Clean and a scotchbrite. Good enough.


But there was still something stopping me putting the (cleaned) 4-lug unit back on the car. It just felt like a backwards step. Cue more to-and-fro on what to do about the third member and the rear suspension. Finally I decided my best option would be to clean up the eight inch third member, stick with the 3.00:1 ratio for now, and direct all my spare $$$ towards an upgraded rear suspension. After all, I'm not building a track car, and while the car may be slow off the line, it will be great for freeway driving. And, of course, I'll always have the option of upgrading the differential in the future, should I choose to do so. Here's a shot of how the eight inch differential case looked when it first arrived in my garage - certainly not as bad as the rear end I removed, but still covered in a very-hard-to-get-off layer of dirt.


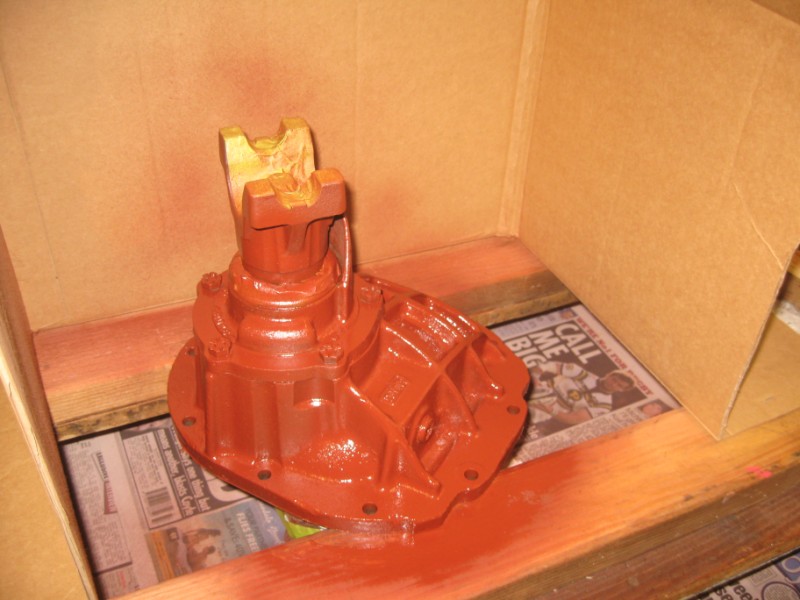
I set up two raised pieces of thick timber to support the differential case, and covered them with a thick piece of cardboard. Using the third member gasket as a template, I cut a hole in the cardboard and suspended the case over the hole - the idea was to keep all the crud away from the inside of the case, and it worked rather well. The cleaning process consisted of sploshing a generous solution of Marine Clean over the case and hacking away at the crud with a paint scrapper and a flat blade screwdriver. My Dad was around over the Thanksgiving holiday, and he did a lot of the cleaning. After most of the dirt was removed the case got a good going over with acetone and a scuff pad, which also removed most of the original paint.

Part way through the cleaning process

One of the problems cleaning an object this shape is that every time you think you're nearly done, you find another small area of dirt still stubbornly hanging on. I think if I was to do this again I would opt for media blasting, but whatever, this project is all about learning after all. When it was finally passed clean, I sprayed on a couple of thin coats of zero rust and left it overnight to cure. 


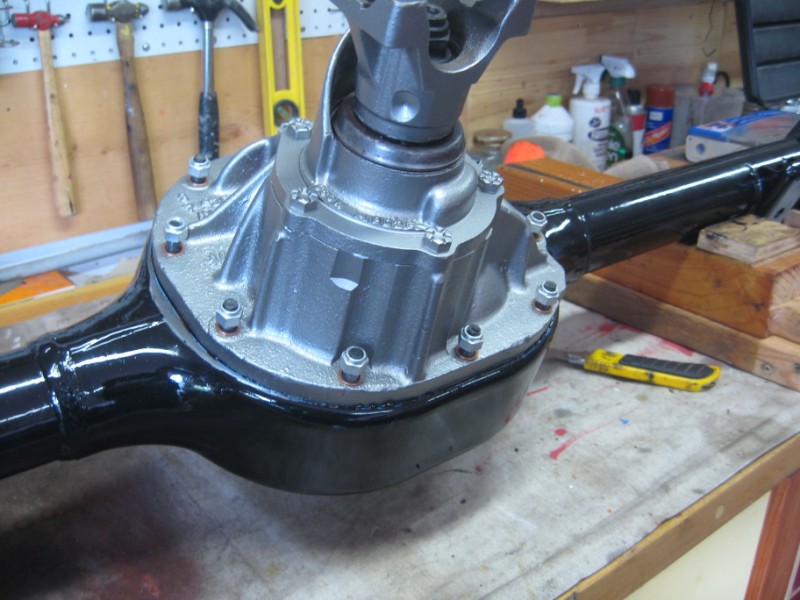
The next day the housing was treated to two coats of Eastwood brake gray - I know most people stick with the stock red color for the differential case, but I wanted to use the gray color to match it in with the axle studs and drum brakes I painted previously.


While the paint was curing I replaced the axle seals in the housing. I probably could have left the original seals in place as they looked to be in good shape, but replacements are only about eight dollars each and it's considered good practice to replace them whenever you have the axles out of the housing.


I purchased a bearing driver kit, which supposedly provides enough different sized discs to facilitate the installation of most seals and bearings. Did I say "most"? Yeah, well exactly. The closest disc was just a tiny bit too big....while the next size down was smaller than I would have liked to use...but seeing as it was all I had, I decided to give it a go.


I had my Dad hold the axle housing upright on top of a piece of 2"x6" timber covered with some towels, and gave the seal driver several moderate taps with a dead blow hammer. This actually worked very well. I was constantly moving the seal driver around inside the tube so that each hit was delivered towards the edge of the seal, rather than in the center where the force may have caved in the new seal.


All in all I was really happy with the results on both sides, which looked like this:

Axle housing fitted with new seals

I bought two quarts of 80-90W oil to use inside the differential housing.


Following a tip from Alex, I tipped one quart into the housing before I installed the third member. The greenish color of the new gear oil was a stark contrast to the dirt black sludge that came out back in the summer.


Next I broke out the Permatex Indian Head gasket shellac and applied a layer to both sides of the new gasket and left it to dry - drying took about ten minutes per side.


I lifted the gasket onto the housing and was careful to wipe any excess gasket sealer off the studs.


Lining up the third member was straightforward, but it required a couple of gentle taps from the dead blow hammer to seat it onto the gasket. I then added new copper washers and stud nuts since the original ones were either smashed up (washers) or looked horrible (nuts).


I then took one of the stud nuts back off, added the ID tag which I had previously forgotten, and replaced the nut. I cranked the nuts down to about 35 ft lbs with a torque wrench - the Ford '68 Shop Manual specifies a range of 30-40 ft lbs for these fasteners, so I tried to hit the middle of this range.


Fitting the drum brakes and inserting the axles requires two more gaskets. The first goes between the housing flange and the rear of the brake backing plate, and the second then goes on the other side of the backing plate and against the axle retaining plate. Once the axle is slotted into place the hold down bolts were inserted and tightened down through the hole in the axle end plate. It was very useful to have an extra pair of hands to help with this process (thanks Dad!), as it was rather involved. I should probably have taken more pictures, but I was more concerned with lining up the various parts with the holes in the gaskets and getting them secured in place.


The housing was then flipped round and the process repeated with the passenger side drum brake. So there we have it: ready to move on to installing the suspension and bolting the axle back under the car. Watch this space!