Sunday, January 16, 2011

passenger compartment part one

The way my restoration is going, by the time I have the car running again there probably won't be a single bolt left unturned, or a square inch of metal I haven't repainted. I've actually been very lucky with my bodywork when I consider how little time I spent inspecting it before I bought the car. Apart from some small holes in the trunk well and the driver side wheel arch, the sheet metal is in excellent condition. I do however have my fair share of surface rust, which, wherever possible, I have ground down and treated with Zero Rust. The thing is, not everywhere is accessible to the wire wheel - this is an issue I faced while I was working on the trunk. And I had the same problem around the inner lip of the roof (note: I have no idea why the underside of the roof is covered with speckles of white paint, and it was the same in parts of the trunk...how odd).

Crusty rust around the inner lip of the roof

I did what I could to sand off the surface rust around the inner lip*. I also scuffed up the underside of the roof - although most of this area was rust free, it was covered with residue from the adhesive used to stick on the roof insulation (*actually, my Dad did the sanding when he was helping out one day while I worked on something else).


The whole area around the edge of the roof then got a good going over with Zero Rust which I applied with a small foam brush - this was perfect for getting a good amount of paint into the tight space.


The roof looked rather odd with a painted strip around the perimeter. I know it really doesn't matter what it looks like as the headliner will cover it all up, but I just couldn't leave it like that...so I painted Zero Rust over the entire underside of the roof - I can't do any harm, and the worse that can happen is that it will peel off. I'm probably two years or more away from installing the new headliner, so I should know by then (!)


The situation inside the C-pillar was similar to the edges of the roof - plenty of surface rust, and very difficult to get at it, even with sandpaper. I did as much as I could, but ultimately had to accept that some parts of the bodywork are just inaccessible.


The inside of the C-pillar then got the Zero Rust treatment too...as far as was possible.


Next up was the inside of the quarter panel (is there a better name for this area?). Adhesive from the vapor barrier was plastered all over the outer panel...


...but this came off quite easily with some lacquer thinner on a shop towel - this method does remove some surface paint, so bear that in mind if you're going to use it. I also hand sanded as much of the surface rust inside the panel as I could get at. I used an eighteen inch piece of garden hose attached to my shop vac to clean up inside the opening.


I was planning to deal with the surface rust inside the quarter panel next, but I got sidetracked by the corrosion on the wheel arch. I went over this area with a 4.5 inch wire wheel on my angle grinder, and got most of the rust off, but the underlying metal is pockmarked.

Pockmarks in the wheel arch just about visible

At this stage I got a bit carried away with the grinding wheel. It was always the plan to take off the seam sealer, as most of it was cracked and loose anyway and there was even some light rust underneath in places...and I just carried on going with the wire wheel until quite a large area of the floor pan was cleaned up. Then I had to clean up inside the quarter panel for a second time...
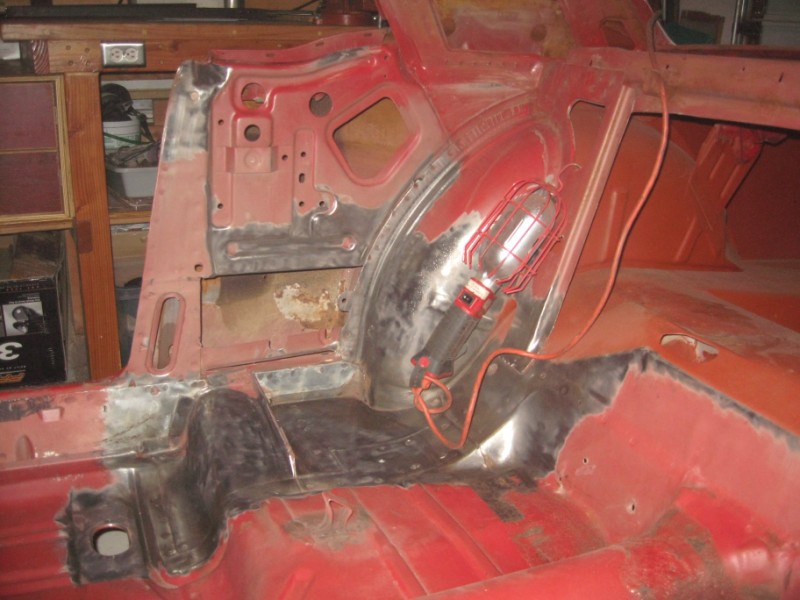

...before I could apply the Zero Rust everywhere I could get to inside the panel. It's a good idea to wear long sleeves while doing this - I just  had a t-shirt on, and by the time I was done there was as much paint up my arm as there was on the car.


Here's a shot from inside the panel after the paint dried. This one is looking down from the quarter window opening towards the rear of the car.


The next picture is looking down and towards the front of the car. Pretty good coverage I think.


The driver side was in similar shape...


Before attacking the rust, I wanted to remove the driver door strike plate. I got the passenger side off with a #4 Philips screwdriver and plenty of liquid wrench, but this time the bolts were rusted solid - after squirting on liquid wrench every day for a week, I gave up and drilled out the bolts. This was a lot tougher than it sounds, and I destroyed a 7/64 ths drill bit in the process, but...eventually...I won.


The residual pieces of bolt thread were removed from the captive nuts by running a tap drenched in cutting fluid through the holes. Fortunately I didn't do any damage to the thread with the drill - I know because I tried putting the strike plate back on with the bolts from the other side of the car and it worked fine. Now I just need to find some replacement bolts...what's the betting I end up buying a new strike plate too?

Drilling out the bolts produced a satisfying pile of metal filings

Here's the "before" shot of the driver side inner quarter panel...plenty of rust here.


It's hard to see in the above photo, but there is a hole close to the wheel arch. Really I should have dealt with this issue before cleaning up the inside of the panel, but my welding skills are not up to a job like this just yet, so it's on the "come back to list" until I get some more practice with the MIG.


The "after" picture taken once the inside of the panel and the C-pillar had been  hand sanded as far as possible and a coat of Zero Rust applied.

Yes, that is a rare turn signal hood in the background.

Friday, January 7, 2011

makin' more room part two

In part one of this story I related the removal of the passenger side seat riser, and the method of lowering the height by about an 1.5 inches. The driver side was essentially the same, the most notably difference being that this side is definitely original to the car, and suggests that the passenger side was too - before I screwed around with it. Here's how:

1. The original sheet metal batch number is clearly stamped on the drivers side platform - although this is not conclusive proof of originality, it is a good sign. I've found similar code numbers all around the car (note: there were no such stampings present on the passenger side...maybe this is normal?)

"2 12 02" - this code denotes the manufacturing plant and shift which produced the panel, but does not include date of production data 

2. There were no burn holes at the transmission tunnel stitch welds on the driver side, but otherwise the pattern of welds around the platforms was identical on both sides of the car; this tends to suggest both sides are original, and that the welder had a lapse when buttoning up the passenger side - it's hard to imagine that Ford would stop the production line to correct such a minor fault.


3. The underside of both platforms were the same - some minor surface rust and virtually no over spray, apart from what I put there myself when I painted the underside of the car..so, if the driver side is original, then the passenger side is too.


Here's a photo of both sides after the driver side platform was refitted:


So time to weld the platforms back in? Well, hold on, not so fast, there are a couple more things to do before we get to that. Firstly there's the support beams: Since I re-sized the platforms, the supports are now too big to fit underneath, which leaves several options:
  • put the platforms back without the supports, after all it seemed to work for Mustangs Plus.

  • fabricate some alternative supporting structure that would fit, or

  • modify the supports so they would fit into the space available
The first option is obviously the easiest, but I'm a big guy and I don't want my seat platforms to start caving in straight after I finish the car (in 2016...!), so that ones out, leaving a straight choice between modifying the original parts or building something from scratch. It seemed like a modification would be easier, so that's the route I started with.

A bit too big!

First of all I turned the support around front to back, so now one end was OK. I then chopped part of the excess length off of the high end with a cutting wheel and bent the edges to the correct angle to meet the floor pan.


Next I measured how much of the support was still standing proud by using a piece of tape...


After using the tape to make some marks, I added another quarter of an inch an used another piece of tape as a guide for the cutting wheel.


The second cut was made at the upper edge just below the fold, so that a triangular shaped piece was removed.


Here's the view after both sides have been cut out:


And now for the BIG MOMENT...time to fire up my new MIG welder. First though, a few comments on why I bought this particular machine. I've been going back on fourth on whether to buy a welder for ages, and there were some valid reasons why not. I only have 110 V available in my garage, so I couldn't buy a really big machine, and with my bodywork being in mostly fantastic shape, I don't have that much need for a welder...but...there are some things that just can't be done without one, and I feel like it is the kind of tool which will be used a lot once it becomes part of the workshop. So, I took the plunge and wrote a note to Santa. Going against the advice from a couple of the guys in BAMA to buy a big budget Miller or Lincoln, I settled on the Eastwood 135 - apart from the excellent review on the Eastwood site, Larry Lyles says it's great, and so does James Bondo, so that's good enough for me.

My new welding set up with added gas tank

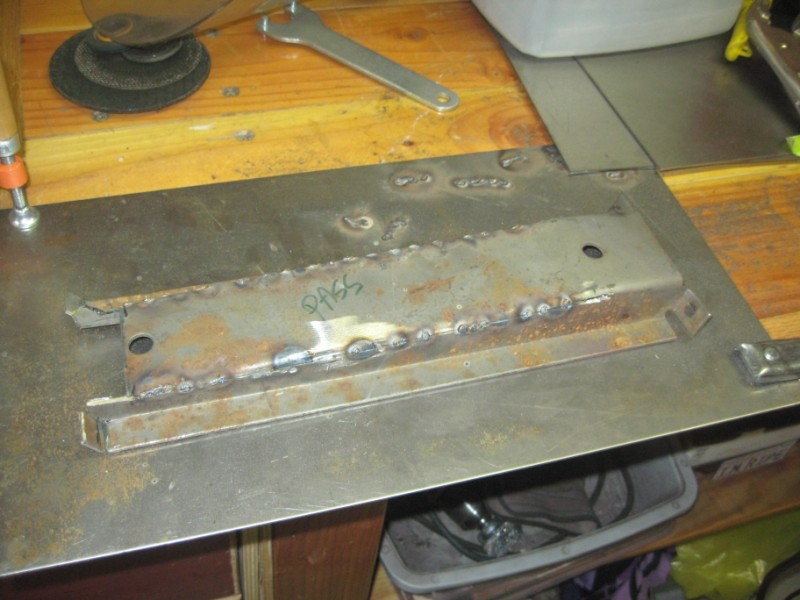
The last time I did any welding was almost 20 years ago (OMG I am SO OLD!), and that wasn't even MIG, so I had a quick practice first on some scrap material first. It took a little bit of trial and error to get the wire speed and heat settings sorted out, but I was ready to move onto the platform support very quickly. After bending the piece into shape, I put down a couple of small tack welds...


 ...and then checked the fit with a piece of cardboard - a blind man would be pleased to see it, as my father used to say.


Then it was back out for "proper" welding up...


I laid down some beads on the inside too - this was probably overkill, but it was great practice and I was really enjoying my self-darkening helmet - this item was no where in sight (!) back when I learned to weld, and I can't imagine how I managed without it. I celebrated by taking the small old style mask that also came with the welder...and throwing it in the trash!


Here's the support after I cleaned up with the angle grinder - MIG welding certainly makes a LOT less mess than the old stick machine I used back in the day.


This is the comparison with the unadulterated support from the driver side (top) and my modified piece (below):

Then, and now...

I then tack welded the support onto the seat platform and tested the fit inside the car - it was great, so I moved onto the driver side support. The welding was MUCH better this time round, in fact I considered smartening up the first piece...and then I remembered where these parts go, so I decided not to bother! Finally I gave both modified supports a quick going over with the wire wheel in preparation for painting.


I marked the placement of the supports under the seat platform, and drilled some 5/16 inch holes for the plug welds.


Next I taped off the area where the welds will join the platform to the support, and painted the area under the support with a thick coat of Zero Rust which I applied with a brush.


The underside of the support also got a coat of Zero Rust, apart from where it will be welded. It would have been easier to use weld-through primer, but I couldn't find any locally, and didn't want to wait to have it shipped; also I'm not really sure how much corrosion protection it provides versus Zero Rust.


After the paint was dry I plug welded the platform to the support. My welding was a bit messy, but it seemed to be strong enough (I hope!).


The finally preparation of the platform was to weld back the support brackets that I previously drilled out.


Then, after checking the fit one last time, I painted the rest of the underside with Zero Rust.


The area of the floor pan that will be covered by the seat platforms was also treated to a coat of Zero Rust, and then everything was left overnight to dry.


The next day I started welding the platforms back into the car. I've often wondered what the access holes in the floor pan are actually intended for - they're not drain holes - but they certainly came in handy for clamping the platforms in place before the first few welds.


I was really pleased with the welds at the transmission tunnel, as I managed to get them done without burning holes through the sheet metal.


After completing the welding on all four edges I gave the perimeter a good going over with the sanding disc and then the wire wheel to clean up ready for paint.


And the same on the other side. The amount of welding was probably overkill, but I was enjoying the practice so I just carried on going. I must say that this is a great place to practice welding, because it will never been seen once the car is finished.

Monday, January 3, 2011

the engine that came home in a box

First, a bit of back story: When I was tearing down the car back in the Spring of 2010, I started at the rear, moved on to the interior, and then, after pausing to move the seats and large parts out of the garage, I attacked the front trim and the engine compartment. Here's an early photo after I took off the air cleaner, fan and radiator hoses:


Then, after removing the distributor cables, carburetor and a few other easy-to-get-at-pieces I had something that looked like this:

Those large white blobs are actually corks!

I knew the motor was going to sit in the car for a while longer, as I had neither a cherry picker or somewhere to store the removed engine and transmission...so...I plugged up the water pump passageways with some champagne corks, and made a piece of cardboard to cover the fuel intake.


Here it is bolted into place:


And that is exactly how the engine remains to this day.


So that's the back story, now it's time for another tale, one that is very, very famous within my family. As a small boy I first heard this story from my Grandfather when, on one of our infrequent visits, I demonstrated a child's interest in transport by driving a toy motorbike round and round the living room. The story goes that my Uncle C, at the age of around sixteen, was absolutely set on acquiring a motorbike of his own - so much so that, to quote my Mother, he "saved every penny he could get" to put towards the purchase. Eventually, when the funds finally reached an appropriate level, a 1955 James 98cc Comet bike was acquired...only there was a twist: he brought said conveyance home in a bucket! Yep, that's right, in a BUCKET! In later iterations, the story was condensed down to the single sentence: "Oh, your Uncle C, he brought his first motorbike home in a bucket you know." I remember, as a child, trying to imagine how one would fit a fourteen inch wheel into a bucket?

As with all family stories, the bare truth is slightly less sensational: Basically, Uncle C bought the James secondhand from some chap who had started taking it apart, and had then either lost interest, or been unable, for whatever reason, to complete the project....the memorable bucket just contained some of the smaller parts while the frame, wheels, and whatever else were transported to the family garage in my Grandfather's Ford van....whereupon Granddad and Uncle C slaved away until the bike was rebuilt and running. The James actually had only two gears and, with such a small motor (98 cc is equivalent to a paltry six ci!) struggled to climb every steep hill it came across (note: the picture below is the same model but not the actual bike of which sadly no photographs survive).

James Comet, an exceeding rare bike these days

The first James didn't last long before it was superseded by a 1956 model with a larger 150 cc engine.

Uncle C astride the 1956 James 150 cc

This bike was replaced in 1961 by a brand-new-from-the-showroom BSA 250 cc C15, which in turn gave way to a Vellocette Viper 350cc single. Like James, both these manufacturers fell victim the the Japanese decimation of the British motorcycle industry in the late 1960s.

Restored example of the BSA C15

My Mother once claimed that each bike was involved in at least one serious accident, and that the ensuing insurance payouts financed the next bigger and faster machine. Whether by accident or design the Viper's time was up in 1963 when it made way for the legendary Norton 650 SS. The SS stood for Super Sports, and with a twin carburetor engine capable of 110 mph, the machine quickly earned a reputation as "the best of the Dommies". After this jewel in the crown Uncle C moved into cars for many years until the two wheeled dynasty continued at the end of the 90's with the purchase of a Kawasaki ZX1100, a bike that still gets used as regularly as the harsh Northern English weather permits.

The immortal Norton 650 SS outside my Grandparents bungalow

The Norton pictured in 1964 after it was joined by a 1947 Morris 8 (in background)

The first convertible, a 1961 Triumph Herald

So, what's this all got to do with the Mustang project that this blog is supposed to be about? Well, I was reminded about the bucket story very recently, and here's how: Back in February 2010, when I was just getting going on my I6 to V8 swap, I started asking around in BAMA for a suitable motor. Somebody suggested posting a wanted ad in the NorCal section of VMF, which I duly did...and then promptly forgot all about it. Apart from anything else, the more I got into my project, the more I realized that changing the motor would probably be the final step in a very long process - a new rear end, 5-lug axles, bigger suspension, disc brake swap, steering upgrade and a five speed transmission were just some of the other things I had to figure out first, not to mention body and paint. So my quest for a new motor never really got beyond a quick flick through the Summit Racing catalog and posting the wanted ad.

And then, when I was least expecting it, I got a note through VMF about a 302 motor that was...you guessed it...mainly in pieces after the owner stripped it down and then moved on to another project. Best of all, the price was way cheap, as the seller was desperate to get shot of the beast from inside his garage. Here it is, apparently complete apart from a pair of valve covers...

The engine that came home in a box!

There were a few other bits that came with the box: the block, with  a cradle stand...


The original heads (not sure if the plugs are original?)


And, wait for it, an Edelbrock aluminum intake - I got the original intake too, although I don't plan on using it, as well as the oil pan, air cleaner, exhaust manifolds and a load of other parts in labeled bags. All in all it was a great deal!


My progress so far consists of wrapping the block in some plastic, and that's the way it will be staying while I finish the bodywork...


Eventually I hope to transform the motor into something a little bit more like this...watch this space!