Friday, June 27, 2014

waiting for the heads

OMG It's been FOUR months! There have been a number of "down" periods on this project - and many more periods of intensive work - but that last few months have been somewhere in-between: short bursts of work punctuated by longer periods of...nothing. Oh well...

At the end of my last post I found myself unexpectedly in need of a valve job and without a machine shop. There are ways to find these things I guess (like the interwebs), but, as mentioned countless times already in this blog, I like to start by asking the guys in BAMA when I need something. What was unusual about this time around was that instead of finding a machine shop, I found a specialist head builder that was already in the club! In fact, the owner of Heads by Steve in San Ramon has decades of experience building heads, many have which have been run in NASCAR teams.

So I cut a deal with Steve to do the valve job, install 7/16 inch screw-in studs, and port match the heads to the gaskets and the intake manifold. When the heads came back a few weeks later they were just....well....immaculate.


And the ports were just so smooth, I could see the increase in power!


While the heads were away, I was marooned at home, surround by lots of boxes filled with shinny new engine parts. This spurred me on to crank through some of the half- and three-quarter-finished mini projects I'd previously abandoned. The first one was the tail lights and trunk wiring harness, which I couldn't face after the painful process I endured below the dash. The tail light buckets were refurbed, and painted brake gray (outside) and brilliant white (inside) back in the Green Room days.


The concave tail lights were the feature that first attracted me to the 67/68 cars in the first place. I acquired a bunch of extra OEM trim pieces from my buddies up the Street at Mostly Mustangs and picked out the best six pieces. I replaced the rubber pads, although attempting the glue the new pads to the trim pieces with weatherstrip adhesive was an abject failure. The studs and nuts were zinc plated way back when...


The tail light connectors were, of course, not included in the Pathetic Painless wiring harness, so I adapted the originals. I did the same with the back up lights. And the fuel tank sender connector....and most of the stuff in the engine compartment too no doubt. The Pitiful Painless harness was actually too short to reach both tail lights, so I did a bunch of chopping and joining of wires that I would rather not have had to do. In the middle I ran out of the wire connectors supplied in the P...p...p...FUCKING AWFUL Painless kit, and had to run to Home Depot. Grrrr!!


I also completed installing the Dynamat in the passenger compartment and taped the joints. Long-overdue!


Next time: Engine Rebuild. I mean it this time!!


Friday, February 21, 2014

engine rebuild spec

The 1969 351W I've been working on for this project has come a very long way since I first set eyes on it back in July 2011. For a start I had to transport it back to the Green Room, where it sat for about nine months before I moved house. After that another seven months ticked by before I started the tear down on my birthday in 2012.

Martinez, California, July 2011

I took the stripped down block to Stirtz Machine in Oakland for magnaflux and integrity testing. The guys at SM are real old school.


On the weekends, they build their own racing cars.


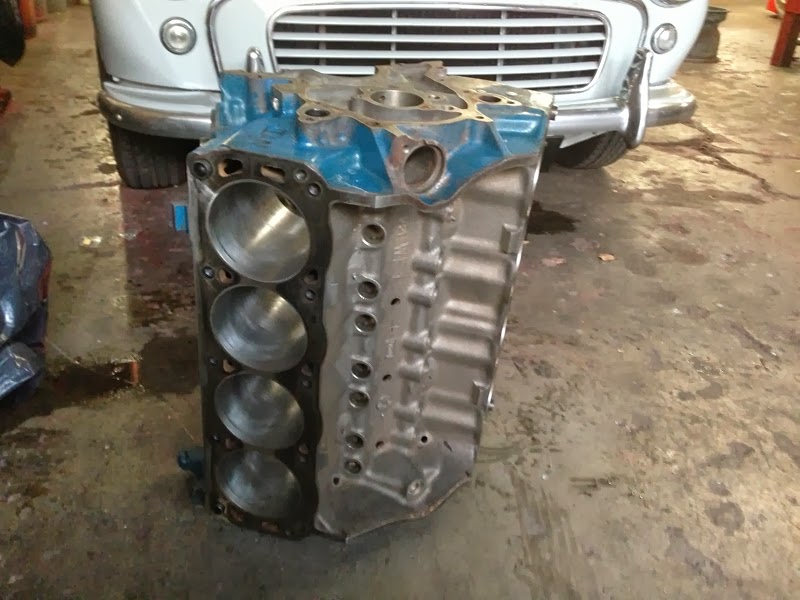
The block came out all sparkly, and the cylinders only needed basic honing - very fortunately because the block has already had an extra 40 thou hacked out of it and anything more than a honing would have been terminal.


After the block passed, I went back to Stirtz and dropped off the heads, pistons and the crank shaft and left the oil pan and timing chain cover for clean up. I also had Carl balance the crank and grind the pistons to uniform mass. I'm pretty sure that I also asked the guys to "sort out" the heads, and although they did give them both the magnaflux treatment, I got the impression that nothing else was needed....so I took everything back home and painted it all red. (Except the crank. And pistons).


It's been a while since the odor of red paint dissipated from the garage, and while I've been making progress in other areas, the motor has been sitting on the stand, providing me with somewhere to stack miscellaneous small items. I've probably mentioned that I've been "narrowing down the spec." in half a dozen or more posts, but the truth is, I've found this process very difficult - which is why it's taken so long. I mean figuring out what cam to buy was tough, and that's just a case of looking at some data. I'm not building a track car, so I don't need anything too wild. (I actually settled on this one from Comp Cams).

Even it my days as a professional scientist I *hated* doing any kind of background research, and it was no different with learning about engine components. When it came down to figuring out spring pressures, retainer styles, guide rails, screw-in studs and yadda yadda....I was about ready to die from lack of interest. This might sound like heresy to most "car guys" but that's how it was. The minutiae of the mechanical aspects just don't do it for me when compared to rust removal or installing a wiring harness. If I could have waved a magic wand at the Summit catalog and had the engine gods assemble my parts list I would have. So, after months of procrastination (and, let's be honest, stockpiling some $$$) I called on my BAMA buddy Chuck and handed over my credit card.

We started off by inspecting the heads, and the first thing Chuck told was I needed a valve job and some replacement valves. So more machine work in other words. This might not sound too bad, but in the seven months since I collected my engine block, Stirtz Machine closed its doors for good after Carl retired. I called S&S in Hayward, but after informing me that "we're not taking no more heads right now" the bird at the other end hung up on me! Still, we put this little snag to one side and spent a couple of hours figuring out exactly what parts I needed to go with the cam. Or Chuck did really. I mostly just listened. I've always gained a much richer understanding of something from fifteen minutes with an expert than I ever did spending hours reading.

The spec. I finished up with was designed around the Comp Cams CCA-CL35-416-3 Cam and Lifters set (Hydraulic Flat Tappet). I bought compatible Comp Cams rocker arms, valve springs and retainers, valve locks and valve stem seals. I also bought new ARP main and head bolts. For the rest of the rebuild I picked up some Comp Cams push rods, a full set of Felpro gaskets, replacement main (std) and rod (-0.10) bearings, piston rings, and a Melling oil pump with a new driveshaft and a Comp Cams timing chain and gear set (Magnum Double Roller no less!). I also splurged on a pair of Hedman ceramic coated shorty street headers. The metallic gray coating goes really well with my aluminum intake manifold and the zinc-plated accent pieces I'll be installing in the engine bay.  We decided not to order valves just yet pending consultation with the machine shop...assuming I can find one!

Lots of boxes like this in other words

Ahhh...headers :)

This is probably a photo too far....

Tuesday, January 21, 2014

increasing the compression

My 351W has been back from the machine shop since July last year. In other words it's been back almost as long as it was away. And, although I'm getting very close to the rebuild, it hasn't happened yet. Funny thing is, when I look back on 2013 as a whole, it was actually a very productive time for this project: much better than 2012 in fact. Twelve months ago I had just about organized an adequate work space at the rear of my tiny garage.


Since then I've re-installed a whole bunch of parts, thrown away a lot more, and in the process generated quite a few empty boxes. I've also acquired my dream toolbox and filled it with a bunch of very nice tools. It really feels like a worthy substitute for the two Marshall 4x12 speaker cabinets I never quite managed to own. When I set up the "shop" I maximized the space by rolling the car up against the vehicle door and positioning my workbench right in front of the car. I even took off the front bumper and the supporting struts to make a extra six inches of work space. This area has served me well. It's had too. But it does not provide sufficient access to the engine compartment for me to install the wiring harness, motor mounts and so-on that I want to complete before I put the drive-train back.

my son has been out of diapers for almost 4 years...

Fortunately I've emptied out enough old boxes that I had enough room to incorporate the toolboxes into my storage area, after a few modifications. This created some extra space, and I was able to shove the work bench about four feet away from the car, leaving myself a nice little work space. The next job is to put the motor back together and then get that Tremec box out from under the bench!

Honestly, it's acres of space

To be cont'd....