Monday, February 13, 2012

the vic hubbard speed shop

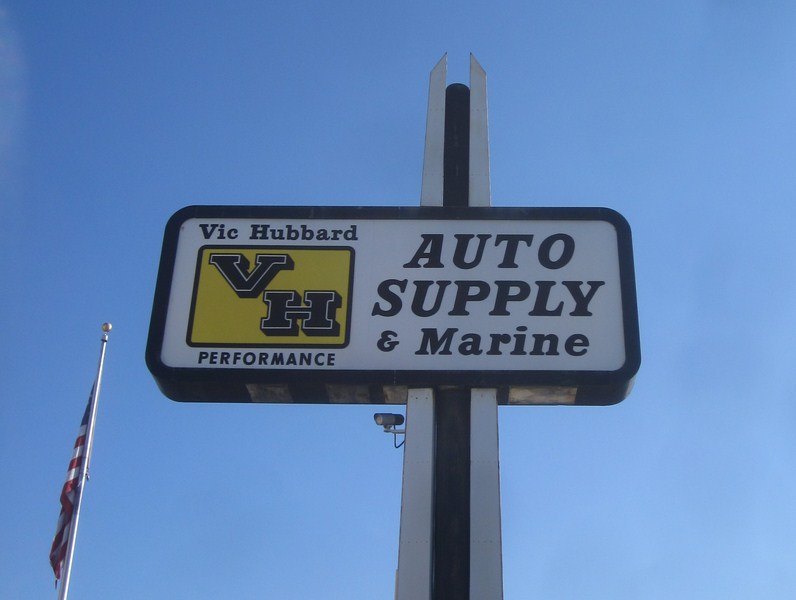
The Vic Hubbard Speed & Marine store in Hayward is one of my favorite places to buy stuff, but recently I was lucky enough to find out a bit more about the company. Founded in 1949 by Jerry Light and named in honor of his step-father and automotive repair shop owner, Vic Hubbard was the first speed shop in northern California.


Located on Meekland Avenue in Hayward in a 1500 square foot building that currently houses the company's corporate headquarters, Vic Hubbard was the "Sears and Roebuck" of the Bay Area auto parts business, coming out on top of a packed field that included Champion Auto Parts, The Gotelli Speed Shop, Cash Automotive, Duane Snider's, Card Automotive Specialty and Algon Fuel Injectors.

Photo credit: WeDidItForLove.com

Historically the major motor manufactures were reluctant to market racing directly to the general public, restricting the supply of performance parts. Jerry Light had the foresight and business acumen to pursue this avenue, and, through stocking the embryonic Vic Hubbard store with just fifteen product lines, Light was instrumental in bringing the performance market north from its origins in southern California.

Inside the Vic Hubbard Speed Shop, late 1960.
Photo credit: WeDidItForLove.com

An early claim to fame arrived when George Poe of TRW was reluctant to lend his company's name to a forged four inch bore 12:1 compression piston. Jerry Light spotted the potential of these pistons and began manufacturing them for Chevrolet applications under the Vic Hubbard name. Soon the pistons were being distributed throughout the United States, forcing TRW to introduce their own range of forged pistons.

Forged piston ads from 60's issues of Drag News - thanks to whoever posted this on VMF.

By the sixties racing remained a specialized market, but Jerry Light predicted that the three barrel Holley carburetor used on the 426 HEMI for NASCAR would be a popular application with potential for huge sales. Jerry instigated a meeting with George Bay from Holley and Vic Edelbrock Jr and ultimately persuaded Holley to build 1000 carburetors for Vic Hubbard in Northern California and Edelbrock in Southern California. The carbs were an instant hit.

The original home of the Vic Hubbard Speed Shop on Meekland Ave, Hayward.

The original Vic Hubbard Speed Shop was also the home of of the Forsberg Brothers, northern California's legendary drag racers. When the already successful Denny and Jerry Forsberg joined forces with Jerry Light in 1962, they formed one of Norcal's greatest drag racing teams. Longtime holders of the Standard 1320 record for class B fuel altered roadsters, they're most widely remembered for "The Mighty Mouse", as their feisty B/FD was nicknamed. Stephen Justice's excellent history of the Forsberg Brothers drag racing activities, including candid interviews with Denny, is online at WeDidItForLove.com

Photo credit: WeDidItForLove.com

In 1976 Vic Hubbard Speed & Marine moved to the 35,000 square foot facility on West A Street from which they currently operate. The company also has a 25,000 square foot warehouse in Tustin from which they service southern California. Within these facilities Vic Hubbard holds one of the largest parts inventories in North America, consisting of over 300 different specialty lines, automotive parts and accessories lines.



Bibliography:

WeDidItForLove.com

VicHubbard.com

Vic Hubbard on Facebook
 
Special thanks to Steve, Rich, Santiago, Larry, Will, Matt, Kevin and all the guys at Vic Hubbard.

Thursday, January 19, 2012

my block sanding vacation part two

So after two full days of filling and sanding, I was ready to paint....or should I say ready to start preparing to paint. The first thing to do was try and rid the garage of all the dust I produced while sanding body filler. This actually took a lot of effort. I swept up the worst of it, but there's only so much you can do with a broom, so I got the compressor going and blew everything towards the door and out into the world (it's only dust, right?), and finished up by wetting down the floor and sweeping again.

Great, onto the car itself. I gave the bodywork a thorough wipe down with shop towels soaked in denatured alcohol. Then I broke out the masking paper and tape and got stuck in. I masked off the trunk and the window and door openings first, and then covered up everything forward of the firewall which I already painted with epoxy primer.


Ok, so getting to the end of day three now, but at least I'm ready to spray the primer. I had just enough epoxy leftover from the engine compartment, but I didn't plan on my paint gun breaking down about three quarters of the way through. This was a major PITA, as I was forced to complete the job with a touch up gun, and it shows, particularly in the second picture below. Fortunately it doesn't really matter, because I'll be doing a bunch more sanding of the car anyway, but it's still annoying.


Last day: I began by applying seam sealer to the drip rails - I didn't take pictures but I used a lot of masking tape while I was doing this and it was well worth it as the process is really messy. After the sealer had time to dry I covered it up with a coat of epoxy using the now-more-appropriate touch-up gun.


While the primer was drying I went over to a buddy's house to pick up a substitute paint gun - one a good deal better than the cheap piece of tat I started with - and then I started preparing for the final part of my block sanding vacation: clear coating the underside of the car.

There has been much discussion on VMF recently about the wisdom of painting urethane clear coat directly over epoxy primer; the reasons for not doing so include:

1. The paint manufacturer does not recommend doing so without the appropriate layer of base coat in between.
2. Clear coat is not as tough as the primer, so the surface will actually be more prone to damage from flying stop chips, road debris etc.
3. The shinny appearance isn't concours correct.
4. One of the purposes of clear coat is to add UV protection, but you don't really need that under the car.

All of these points have their own merits, and you can add to the list that it's costly and time consuming...but then isn't everything, so I came up with my own list of reasons for doing it anyway:

1. The key to paint compatibility is really to do with surface preparation and application, plus I don't think that base coat and clear coat are chemically all that different, they're both urethanes, so that's point one dealt with provided I scuff up the existing primer to give the surface some "tooth".
2. Clear coat may well be easier to scratch than primer, but it still provides additional protection to the metal underneath - you can't scratch primer at all if it's covered with something else, can you.
3. Nothing on my car has been done to make it "correct" because I couldn't care less about concours requirements; I'm building the car I want.
4. I happen to like the look of shinny stuff more that dull, so that's that.

Here's the masked off look:


And here's how the underside came out after the clear coat dried: all nice and shinny!


Tuesday, January 10, 2012

my block sanding vacation part one

One summer back in the midst of my youth I found myself working in a factory that manufactured wallpaper sample books. A good deal of this work consisted of sticking rectangular pieces of border paper on top of square pieces of wallpaper...by hand. It wasn't the most stimulating or fulfilling endeavor, to say the least, and as a result the area of the factory where folks toiled away at this onerous task - in fact just a large group of tables in the center of the building - was collectively known as "the patch"....on the basis that you had to be a cabbage* to work there!

Suffice to say, management were not overly keen on this phrase being bandied about, but it did tend to (cough..) crop up quite a lot, for example a co-worker might be heard to comment: "Tim was late again this morning, now he's stuck on the patch" or perhaps "that new guy is awful, he'll be on the patch before the end of the week" and so on. I was hardly ever late, and never misbehaved with the boss's daughter (his son was an only child!), so fortunately my exposure to life on the patch was minimal. Still, over the years, memories have occasionally flashed before my eyes, usually when I've found myself doing something mind numbingly boring....which brings me on to the real point of this post: block sanding.

I've been dreading the body-filler part of this project for a number of reasons, not least because just one quarter panel was enough to stop the Restoration King in his tracks...but eventually the time came when there was nothing for it but to take the plunge. I started out by investing in a set of Durablocks and some rolls of self-adhesive sandpaper in various grades and I tapped into my friend Chuck for some advice on technique before I got started.


I also did some reading up on what type of body filler to use - my only experience of using filler prior to this project was when I helped my father plaster it over his Consul sometime in the early 80s....we even used some chicken wire too I recall.  This time I chose to go with Evercoat's Rage Extreme, based amongst other things on this review.


But, hold on, before I actually got started I had to battle though a severe bout of can't-be-bothered-with-this-project-ever-again-itis. Then, after a week or so of being entirely consumed by this illness, I noticed some very small rust spots forming on the car bodywork (!) which was exactly what I needed to spur me into immediate action! In fact the turnaround from lack of interest to desperation was so rapid that I booked two days off work next to the weekend, and vowed to have the car in primer by the end of day four. To start with, here's a picture of the filler being mixed - every bodywork blog I've ever read has a version of this picture, so I had to include my own. I found a huge box of mirror tiles in my garage when I moved in and I found they make excellent filler-mixing surfaces.


The worst damage was at the driver side quarter panel, so that's where I began:


The first footprint in the dust. By the time I was done sanding, there was dust everywhere in the garage, but I was careful to keep it out of the house!


My basic methodology was to apply the filler, give it 20 minutes to harden, and then attack it with my seventeen inch long board and some 80 grit sand paper...and then repeat the process. For the first few cycles I was mainly concerned with knocking down the high spots in the body work, but eventually, thanks to my favorite BFH I came out the winner. Here's the car at the end of the first day with one quarter panel well on the way.


Day two and time to move onto the roof and A-pillars:


I was still struggling with boredom, but after a day and a half I had refined my technique such that I was applying less filler each time and doing less sanding on each iteration...after the roof was taken care of I moved onto the passenger rear quarter and the then the tail light panel.


The funny thing is, the more time and effort I put in, the more I wanted a great result...but you have to stop somewhere, and anyway I'll be doing a lot more filling and sanding after the first coat of epoxy, so I didn't beat myself up too much over getting it absolutely perfect. Essentially I worked on getting it as good as I could by the end of day two, and then to wrap up I gave the entire car a light going over with 120 grit and called it done. Coming in part two: clean up and paint....so stay tuned.


*cab·bage [kab-ij], noun,
1. Any of several cultivated varieties of a plant, Brassica oleracea capitata, of the mustard family, having a short stem and leaves formed into a compact, edible head.
2. (Chiefly British Informal) (a) a stupid, dull, or spiritless person (b) a mentally impaired person who is unable to live independently; vegetable.