Showing posts with label mig welding. Show all posts

Monday, December 3, 2018

the next bit

January 2016: with the fenders all restored and back on the car it was time to re-build the front of the car and and finish the wiring in the engine compartment. I started with a Dynacorn front valance - I still have the the original, but it has several dents and some rust and I couldn't be bothered to restore it. The replacement was an excellent fit. I can't say the same for the stone guard - the reproduction part was awful, so it was back to my shed to restore the original.


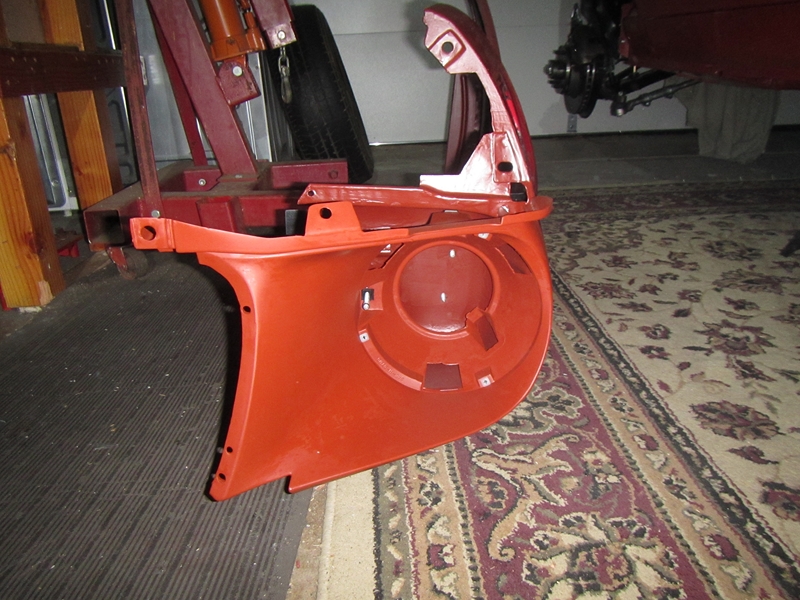
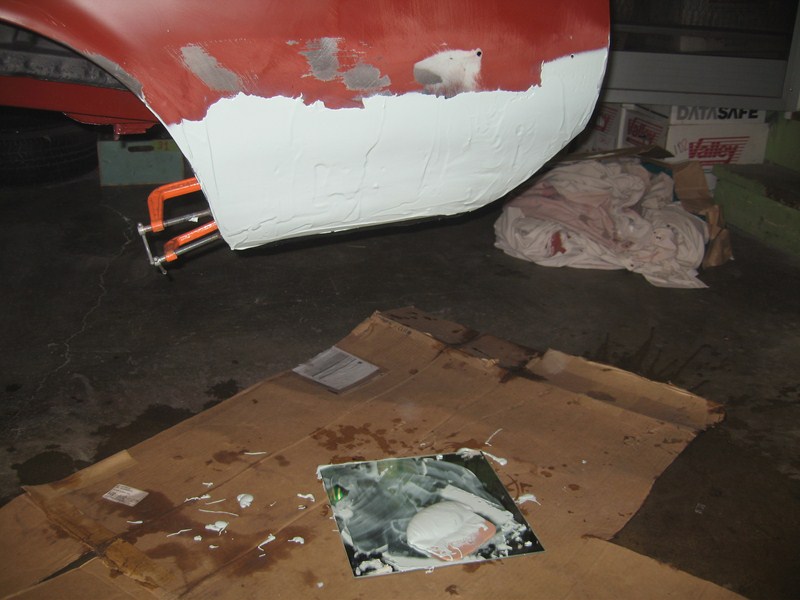
As usual, the first step was accomplished with a mixture of the trusty wire wheel and some aircraft stripper I had left over from this project.


There were several holes in the stone guard that I didn't really need. I blame whoever installed the 1970's AC. The holes were filled in with the MIG welder and ground down, painted with primer, yada yada...


And it dropped right in! No adjustment required. The picture below was taken a bit later after the front bumper had been bolted on.


I also installed new trim pieces - the originals have irreparable AC-related damage.


I bought a reproduction grille and installed the original trim pieces and my custom GT fog lights with their zinc-plated mounting brackets.


The back bumper was bolted on around the same time. Both bumpers need re-chroming at some point in the future. The rear bumper is also slightly bowed.


At the end of January 2016, Amy and I took an early morning trip to the world famous Turlock Swap Meet, where, among other things, I was finally able to locate the third member I've been looking for all these years. Older readers may recall be interested to know that I have been rolling the car around on a 3.00:1 gear ratio, which just happened to come with the eight inch rear axle I acquired for this project, while searching for something a bit lower....at the right price.

The key here, as often, is price. I was reluctant to drop a thousand bucks on a complete third member when I already had one, and I was quoted a similar amount for a local shop to swap out the gears....so I sat tight and waited.....and then found almost exactly what I wanted (3.40:1 rather than 3.50:1), at a price I could not quite believe.

The following weekend the housing was painted with Eastwood brake gray and installed with a new gasket and some shinny copper nuts and washers that I got from NPD.

Lovely-Jubbly!

Back to work on the engine...I installed the distributor and most of the under-hood wiring was done by this point.


The valve covers had been wrapped up and stored for over three years when I broke them out in March 2016. The export brace came from a Turlock visit in 2011. Installing the brace was seriously difficult but I made it fit.

Looking good...

Looking even better...

Monday, November 26, 2018

repairing the fenders

December 2015: now this is where things went off at a tangent...again! Most of the bodywork on this project was done back in 2011 when I was custodian of a very large garage in Hayward known as the green room. The body shell and most of the parts that will someday be repainted body color were stripped down, repaired, primed with PPG epoxy and treated with body filler (rinse & repeat etc.). So far so good, but when the time came to move garage the trunk lid, hood and both fenders were still in “pre-restored” condition.

And that’s how they remained, for a number of reasons, but mainly because the garage I moved to was too small to set up a welder and a paint gun. Fast forward to the Christmas/New Year holiday at the end of 2015 and I had to decide whether I was going to put a pair of horrible rusty fenders back on my nice clean car....or do something else?

The something else came down to a straight choice between stopping the rebuild to restore the fenders, or replacing them with reproduction parts and getting back on with the rest of the assembly asap. I must admit to a lot of back and forth on this. While Dynacorn™ reproduction fenders are available for less than $150 each through Tony at RPS in Hayward, I was really concerned that they would not line up properly. But then my original fenders were not in the best of shape either and I knew they would take a lot of precious time to restore. Ultimately I decided on restoration of the originals.

Over the Christmas holidays at the end of 2015 I took the fenders off the car and transported them the three blocks back to the shed I built the summer before last. Here is the "before" photo:


I broke out the wire wheel and ground off all the accessible rust and grot from the inside of the passenger fender.


The only seriously damaged area was in the bottom corner at the rear of the fender. This area was cut out with the screaming wheel of death and replaced with new metal using the MIG welder than had been stuck inside a box for the prior four years.


The repaired area was the filled with Bondo™ and sanded, more than once.


A similar repair was made at the inside.


The bare metal was painted with rust converter which was sprayed in the areas I couldn’t get to with a brush. Lovely jubbly.


The unprotected section of the inner side of the fender was treated with a think layer of rubberized bedliner


All these steps were repeated with the driver side fender over the following few days. My shed was too small to work on more than one at a time. When they were both completed, I broke out the replacement fender ornaments I've had in storage for...well years, obviously. The engine has been upgraded from the 200 cid straight six, to the 351 cid Windsor, and I wanted to mark that with the right "351W" fender badges, even though this engine was not available in the Mustang in 1968. Of the four pegs which secure the new ornament, three are in the same place as the originals so I had to drill one extra hole in the fender....better to do this now than after paint!


The original splash guards were in awful shape so I bought replacement parts from NPD and assembled them in my shed.


I installed the replacement splash guards back at the garage:

One piece goes inside the front of the fender...

...and the other attaches to the car body

I also attached the front fender caps which were refurbished and spray painted with epoxy primer way back when.


Finally the fenders were hung on the car and the headlight buckets installed.  Happy New Year 2016!

Sunday, June 24, 2012

blowing hot and cold

Yay! Finally done with the welding. However, what I did discover after a couple of goes at patching the quarter panel was this: no matter what you do, when you do this much welding, some warpage of the sheet metal is inevitable. So, the next step was to do what I could to improve the situation with my body hammer and dolly. The answer is not much! In fact, the first thing I did was make the situation worse by stretching the seam and developing an "oil can" effect in the metal. Great.

I did some research on the net, and conferred with Sven (thanks again!), and I discovered that the modern method of dealing with stretched metal is a shrinking disc. The old fashioned method meanwhile, is to heat up the metal with a propane torch, and then rapidly cool it with a wet rag. The rapid cooling causes some shrinkage of the metal, which, after several applications, should be enough to eradicate the oil can effect. For me, the big problem with the shrinking disc was availability. I was trying to get going on the project and it would have taken me a week or so to acquire this tool....so I drove over to Home Depot and laid down fifteen dollars for a propane torch. I already had the wet rag on hand.


The metal shirking was actually a lot more simple than I thought it was going to be, and after a couple of hours of heating and cooling....and body hammering....and repeating...I was happy enough to start roughing up the surface ahead of the body filler.


After I got done with the body hammer I painted over the inside seam with some Zero Rust and then covered the entire area with seam sealer.


Here's my first bash with the body filler.


It quickly became apparent that (i) there were still a TON of high spots and (ii) I was going to have to skim the entire quarter panel.


Take two with the body filler. This is easily the most filler I have ever mixed up at one time. Good thing I bought a gallon of filler.


Getting there now, but still several more high spots to deal with.


Finally got it as good as I possibly could and ready for primer.


But...hold it right there! Before I got out the compressor and converted the garage into a paint booth, I wanted to prep a few of the other small parts for primer. I actually quite like the painting, but the biggest part of it is getting the garage ready....so, when the garage is in paint booth mode, I like to paint as much stuff as possible. I collected together all the parts that will (eventually) need to be painted body color that I had not previously worked on....except the hood, deck lid and fenders that is...and stripped off the thick, eggshell-like paint. This is quite easy with the aircraft stripper I usually use.


The fender extensions/headlight buckets were a bit more difficult to strip.


After stripping I gave everything a REALLY GOOD going over with water to neutralize the stripper, and then sanded everything to 120 grit.


Time to mask off the parts of the car than I didn't want to paint. I was taping off almost the entire car, so I did some of the masking with decorators plastic sheeting. This worked quite well as long as I used several layers and taped the sections together.


Allowing access to both sides of the repaired area meant the masking was a little bit more of a challenge, because I couldn't just close off the entire trunk/interior area. Also, I wanted to make sure there was no over spray on the underside of the car since that area has been declared finished.


The quarter panel got the usual epoxy primer treatment: two coats with about 20 minutes flash time.


I had plenty of primer left to lay down two coats on all the small parts too.

Monday, June 11, 2012

patching the quarter panel a second time

It was always my thinking with the Canadian patch that if it works great.....and if not, it's great practice before I cut up an expensive Dynacorn panel. It's annoying that Dynacorn don't sell a patch panel, but there's no question about the superior quality of what they do sell. While I was at it, I ordered up the outer wheel arch so I could patch that too.


Here's the car after suffering a second attack from the Killer Kutting Wheel. I cut out the lower couple of inches of the wheel arch at the same time.


I chopped a larger-than-really-necessary chunk off the replacement outer wheel arch, and then spent what felt like a long time trimming, fitting, and putting a flange on the patch.

view of fitted patch from inside the trunk

clamped

welded...mostly.

OK, so onto the main event. Everyone I know hates using the cutting wheel, but chopping up an expensive $$$ body panel - and then discarding 80+ percent of it - adds a new dimension to the pain.


Another heavy bout of back-and-forth fitting the replacement panel eventually led to a much smaller piece which I flanged with my homemade pliers.


This time I used Clecos™ to secure the patch instead of sheet metal screws, which was much more satisfactory.

many hours later....all welded up

After the welds were ground down I was much happier - I'm quite sure it would not have come out this well if I hadn't practiced first with the Canadian patch panel (or had so much help from my blogger friends!) Now, back to the body filler!!