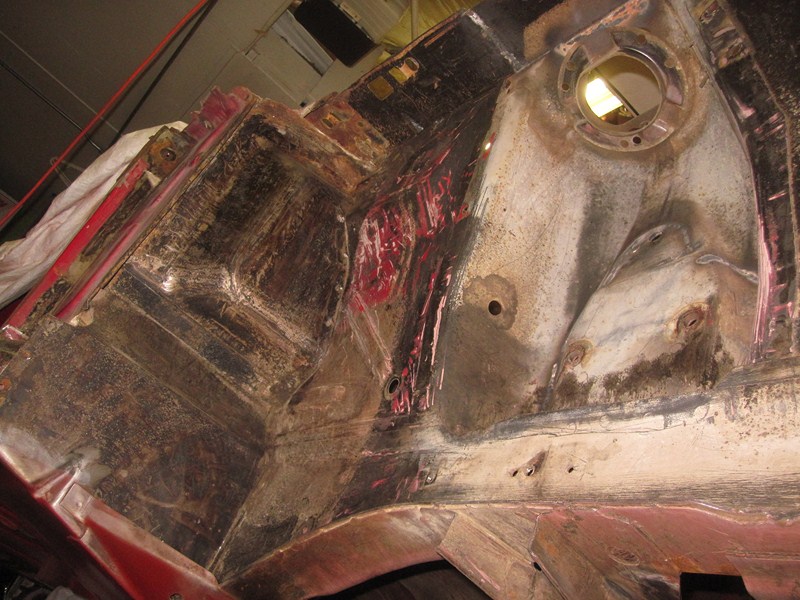
Lately I've been doing a lot of welding and grinding, but very little wire wheeling. Still, firing up my trusty DeWalt angle grinder has been at the back of my mind throughout, mainly because I know that once I get the engine compartment scrubbed out and coated with epoxy the worst of the project will be over. Here's the view after I was done with the shock towers and fender apron replacement.
The six cylinder mustangs came with a rubber strip attached to the radiator support - there has been some speculation on
VMF that these cars were difficult to start in cold weather, and the strip was some kind of insulator, but nobody knows definitively. The strip was stapled on to the radiator support, leaving a series of small holes, which I decided to weld up - I won't be putting the rubber back, so why not.
There were also some extraneous holes in the front cross member, the legacy of a post-factory installation of GT fog lamps. I'll be putting the fog lamps back eventually, but I'll be doing it with a little bit more finesse, so these holes had to do one as well.
There were also several opportunities to refine my skills with a set of body hammers and dollies, after my friend Chuck gave me a quick lesson on techniques.
Then it was time to work on the frame rails, starting by blowing out forty two years worth of dust and grit...and there was plenty of it.
I taped up all the holes in the frame rails and then gave the inner surfaces a thorough going over with Eastwood's
internal frame coating. This product comes in a rattle can fitted with a thin plastic tube that discharges through a diffuser. I sprayed on far too much, until it started dripping out of holes at the bottom of the rails.
The engine mounts got a good cleaning out and a coating of Zero Rust.
The final step before the wire wheel was removing the undercoating on the outer aprons and behind the wheels. I got rid of this with my heat gun and a putty knife, which was much, much easier and a lot less messy than grinding it all off. Two hours later and I was all ready for the wire wheel.