Showing posts with label brakes. Show all posts

Tuesday, November 20, 2018

engine parts and cable clutch

Fall 2015: the engine was in, the water and fuel pumps were installed, and the brake system was complete.

Not too shabby

Next up: the radiator. This how it looked in about 2012 when I acquired it from one of my mates in BAMA. I think it was painted either at the last garage or at the Green Room along with most of the other black engine parts.


I have a custom overflow bottle which I painted at the same time along with the side panels which help attach the radiator to the car.


This is how the radiator looked after installation. I had to take it back out later on to do the wiring... 


I may have mentioned earlier that step-by-step photos just don't exist for much of this period, and anyway, most of it was just bolting on shinny new parts that had been sitting in their boxes for a year or more.

bolted on the mini starter

mounted the electronic ignition box at the driver side fender apron 

harmonic balancer with 4-bolt pattern 

one of two inline fuel filters

I had decided to replace the original clutch linkage with a cable. Thankfully for a novice like me, the guys at Modern Driveline have produced a kit which makes it very easy to marry up the cable with the original zinc-plated clutch pedal and my modern Tremec T5 transmission. I also got a replacement speedometer cable at the same time, and I had the gears setup for the 3.40:1 differential.


Installing the kit was easy. The only issue was that I had to remove the master cylinder and disconnect the push rod before I could install the supporting plate. Installing the speedometer cable was a bit more involved. The first one I tried was about a foot too long, so I had to get a replacement, and I had to take the instrument cluster out twice. This was all too tedious to photograph.


This is how the distribution block and proportioning valve looked after the master cylinder was re-installed and the brake system bled....again....


I used a welding rod to figure out the ideal shifter stick position, and then ordered the nearest I could get from Summit.


This is how it looked with my custom handle installed ;)

Sunday, January 25, 2015

putting the brakes on

I finally got back to some mechanical work at the beginning of October. Longer term followers of this blog might recall that I had a few problems with my front brake system. I tossed away the six cylinder drum components and replaced them with an old Granada set up that I acquired through the BAMA mafia. Later I found that the the hub size on the replacement Granada rotors was too big for my wheels. This led to me transferring the car from the Green Room to my garage in Emeryville with a pair of Ranger wheels on the front. That was in April 2012, and that's exactly where those wheels stayed for the next two and a half years.

Ranger wheels: not very sexy.

I always planned to take the replacement Granada rotors and have the hubs turned down so they fit the wheels. But I struggled to find a machine shop that could do this for me. Later I talked to Mike Maier about the inadequacies of the Granada swap. A couple of months after that I was in Reno for Hot August Nights when I found myself being dragged into the "Big Boys Toys" exhibition hall, and slowly sucked towards the Stainless Steel Brake Co stand. A few minutes after that one of the Summit Racing guys was passing my credit card though an exceedingly hot swiping machine. It must have been hot, because the credit card was melting when I got it back!! A week or so after that some very heavy SSBC boxes showed up at the house. Around this time I also ordered the roller spring perches from Opentracker Racing that we've all heard so much about.

Roller perch (left) and static stock option (right)

After tearing off the Granada spindles (and all the related parts which I spent time restoring...sigh...) it was straight forward to install the SSBC spindles, dust shields and rotors. It's probably fair to say that the SSBC system is overkill for this car, but I just decided not to make any ecconomies with the brakes.


Getting the caliper brackets and calipers assembled and installed correctly was a bit more traumatic, but I eventually got there. Then I wiggled the car away from the garage wall and did the same to the driver side.

Wheels fit now..!

The SSBC brake system comes with a new master cylinder (MC), flexible lines, and all the hardware. It also includes some short sections of hard brake lines, because the setup requires several modifications to the stock lines. Plus you have to install a proportioning valve (PV) that wasn't needed with the original all-drum system.

One of the reasons for working on the brake system now (and the fuel system next) is that I wanted to get all the lines installed before I put the engine and transmission back in. So I ordered up a set of stock brake lines from NPD and set about attaching them to the chassis. The rear brake lines went in just so, and I made finger-tight connections to the wheel cylinders. Nice. The central line at the transmission tunnel and firewall and the connections at the front discs were also pretty easy. I was able to utilize most of my shinny zinc plated hardware with the SSBC brackets.


I bolted up the MC and connected the brake pedals and the piston. You are supposed to bench bleed the MC before installing it in the car, but I didn't because I only bothered to read the instructions afterwards. At this stage I was a little bit more concerned about where to mount the PV and how to get the lines anywhere near to the MC, never mind connect flawlessly.


Of course there was no distribution block included with the SSBC kit, so I had to dig out the original and refurbish it. That's one more time that keeping EVERYTHING from the tear down has saved me.

That's better

I guess it also goes without saying that the brake lines that come in the SSBC kit have completely different connectors to the ones that come from NPD. And they're not quite the right shape, and anyway I've never had to make custom brake lines before, so why not now? Well the answer to that questions is probably "because it's a tedious PITA!" First I had to invest in a pipe bender, and then a flaring tool, and then in some extra brake lines from the local parts store, and then some more spare brakes lines...and...well when it was all done it looked like this:


Now to me it wasn't too bad for a first time, but I know for a fact that some of the flanges are not right, and that a lot of the bends look amateurish. For now though, it's a start.
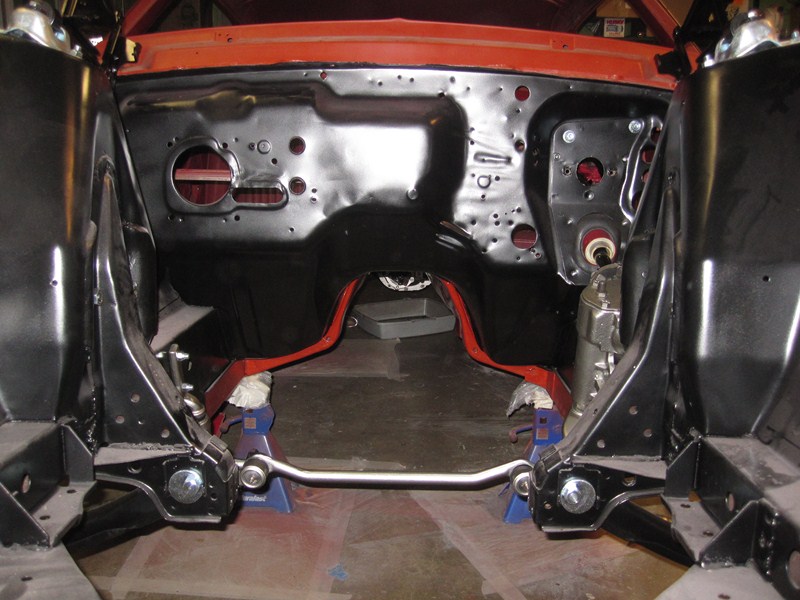
To be continued...

Monday, November 19, 2012

last minute hitch

I was supposed to be a pair of fenders and the front wheels away from rolling. The fenders went on quite easily (doesn't everything by the fourth time!), and I didn't waste much time on the alignment.


So far, so good. Now the wheels....well this was where I ran into a snag. You see my brakes came from a Granada setup that my friend Terry donated to the cause, and while I used the spindles, the rotors had either worn or been surfaced below the minimum thickness...so I had to throw them away...which is exactly what I did, soon after I acquired them.

Now you see it...

Now....fast forward a few months, and it's time to move the car...and no rotors. Fortunately it wasn't a big deal to get a pair of replacements. At least it wasn't a big deal after I paid a visit to my buddy Mark at the Vic Hubbard Speed Shop. As well as the rotors, Mark sorted me out with all the bearings and seals, and for a great price too. So all good....well, not so fast. What I didn't realize, when I ordered the "Granada rotors", or even while I was installing them, was that the hub on these discs is larger than on the Mustang rotors...which means, in layman's terms...that the wheels won't fit on. Oh $hit....school boy error :( This would be bad enough anytime, but on the day before I needed to move the car I could have got by without it.


These are the roller wheels I have on at the back of the car - part of a set of four that I stole from my friend Terry's backyard while he was at work. They used to have the limited edition center caps until our friend James took them off and sold them! One day they will be replaced with some Magnum 500's and a set of classic BF Goodrich treads.


But.....nothing I could do was going to make these wheels fit on over the rotors I just installed, so I made yet another frantic SOS call to my good friend Chuck...and after a quick wave of the BAMA magic wand, we managed to borrow some appropriate wheels from one of the guys at Mostly Mustangs in Oakland. These wheels actually came off a Jeep. It's not quite the look I'm going for, but seriously, I don't know where I'd be without my car-guy friends....probably still trying to change my oil pan gasket.


Looking more like a drag car than ever:


Leaving, as it arrived, on the back of a flat bed:


Settling into the new home:


to be continued....

Sunday, November 11, 2012

front end install

The moving deadline has been and gone since my last post, and the car is now neatly ensconced in its new home....but the whole episode was far from straight forward. When I left off last time the car was a front end installation away from rolling anywhere, so that's where I'll be picking up. Removing the front end was actually one of the first things I did after the last house/garage move, so kind of fitting to (almost) end there. This was the condition of the tie rods after I removed them:

looking a bit better after encountering the wire brush
painted brake gray at the same time as lots of other small parts


I replaced the stock outer tie rod ends with larger ones to facilitate the upgrade to V8 spindles which have a slightly larger hole.

replacement parts on left, stock on right
the threaded connecting brackets were zinc plated
In the future I plan on replacing the original steering box with an aftermarket replacement, but I'm still a long way from deciding which one to get, so it made sense to spruce up the original box and put that back for the purpose of moving the car. Fortunately I accomplished this well in advance - I actually got a bit carried away and painted the box brake gray, so it may survive a while longer.

40 years of oil and grime
so clean...
...it deserves two pictures.
back in the car again.

And now to the brakes. I always planned to swap the 4-lug drum brakes that came with my car for some decent disc brakes, but the Granada swap wasn't exactly what I had in mind....until my friend Terry donated a Granada set up that had previously been installed on a 67 Mustang.

first sight of my "new" brakes in Terry's '63 Ranchero

The dust shields, spindles and caliper brackets got worked over with ye olde wire wheel, primed and then painted with the same Duplicolor black I used everywhere else.

also had to do a bit of bashing to fix some dents here

Which takes us to here the picture below - all ready for assembly, but very little time left, before moving day, and a house to be packed up in the background....almost panic time in fact!


So I did what I always do when I need help with my car: reached out to a buddy, this time round my friend Chuck from BAMA. With his help, we got the springs compressed with the floor jack (!), installed the shocks, and then bolted on all the front end parts in just a couple of hours. Unfortunately from the point of view of this blog, I was acting as tool dolly/part locator for a lot of this time, so I didn't really have time to take many pictures.

Chuck bolts up the steering
love the black and gray look (with dust)
zinc plated shock tower brackets
more zinc, blah blah...

After Chuck left I installed the support brackets and latch for the hood and my new one inch sway bar with polyurethane bushings which I got from Mustangs Plus. It wasn't strictly necessary to put all of this stuff back but I did anyway because it means less parts to move/store The rear bumper and valance were bolted back on for the same reason.

Hope to see a lot more of this in the future (minus the garage door!)
So, just a pair of fenders and two wheels away from rolling....