The moving deadline has been and gone since my last post, and the car is now neatly ensconced in its new home....but the whole episode was far from straight forward. When I left off last time the car was a front end installation away from rolling anywhere, so that's where I'll be picking up. Removing the front end was actually one of the first things I did after the last house/garage move, so kind of fitting to (almost) end there. This was the condition of the tie rods after I removed them:
 |
| looking a bit better after encountering the wire brush |
 |
| painted brake gray at the same time as lots of other small parts |
|
|
I replaced the stock outer tie rod ends with larger ones to facilitate the upgrade to V8 spindles which have a slightly larger hole.
 |
| replacement parts on left, stock on right |
 |
| the threaded connecting brackets were zinc plated |
In the future I plan on replacing the original steering box with an aftermarket replacement, but I'm still a long way from deciding which one to get, so it made sense to spruce up the original box and put that back for the purpose of moving the car. Fortunately I accomplished this well in advance - I actually got a bit carried away and painted the box brake gray, so it may survive a while longer.
 |
| 40 years of oil and grime |
 |
| so clean... |
 |
| ...it deserves two pictures. |
 |
| back in the car again. |
And now to the brakes. I always planned to swap the 4-lug drum brakes that came with my car for some decent disc brakes, but the Granada swap wasn't exactly what I had in mind....until my friend Terry donated a Granada set up that had previously been installed on a 67 Mustang.
 |
| first sight of my "new" brakes in Terry's '63 Ranchero |
The dust shields, spindles and caliper brackets got worked over with ye olde wire wheel, primed and then painted with the same Duplicolor black I used everywhere else.
 |
| also had to do a bit of bashing to fix some dents here |
Which takes us to here the picture below - all ready for assembly, but very little time left, before moving day, and a house to be packed up in the background....almost panic time in fact!
So I did what I always do when I need help with my car: reached out to a buddy, this time round my friend Chuck from
BAMA. With his help, we got the springs compressed with the floor jack (!), installed the shocks, and then bolted on all the front end parts in just a couple of hours. Unfortunately from the point of view of this blog, I was acting as tool dolly/part locator for a lot of this time, so I didn't really have time to take many pictures.
 |
| Chuck bolts up the steering |
 |
| love the black and gray look (with dust) |
 |
| zinc plated shock tower brackets |
 |
| more zinc, blah blah... |
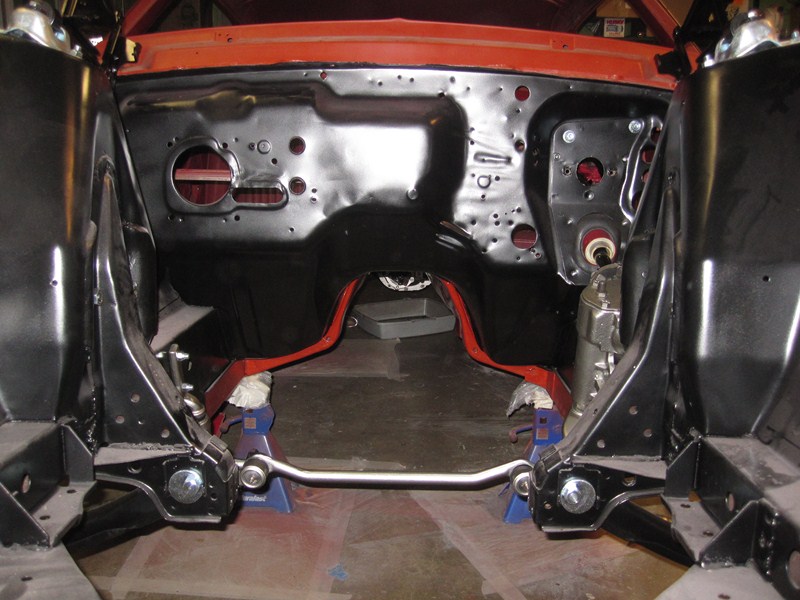
After Chuck left I installed the support brackets and latch for the hood and my new one inch sway bar with polyurethane bushings which I got from
Mustangs Plus. It wasn't strictly necessary to put all of this stuff back but I did anyway because it means less parts to move/store The rear bumper and valance were bolted back on for the same reason.
 |
| Hope to see a lot more of this in the future (minus the garage door!) |
So, just a pair of fenders and two wheels away from rolling....


Wow! That is some right spiffy looking work! Just curious who makes the silver color you used on the parts?
ReplyDeleteIt is "Eastwood Brake Gray" Kind of expensive, but it goes on really nice and I love using it. Thanks for the encouragement :)
DeleteThat is spectacular looking! I need to go back and look at your zinc process when I get to that point. Great progress!
ReplyDeleteAwesome progress and a great-looking front-end!
ReplyDelete