
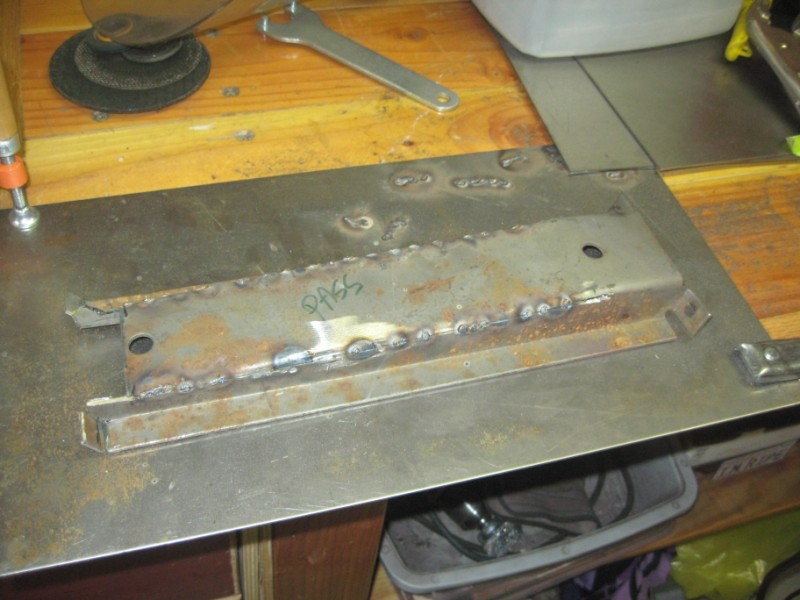
1. The original sheet metal batch number is clearly stamped on the drivers side platform - although this is not conclusive proof of originality, it is a good sign. I've found similar code numbers all around the car (note: there were no such stampings present on the passenger side...maybe this is normal?)
 |
| "2 12 02" - this code denotes the manufacturing plant and shift which produced the panel, but does not include date of production data |
2. There were no burn holes at the transmission tunnel stitch welds on the driver side, but otherwise the pattern of welds around the platforms was identical on both sides of the car; this tends to suggest both sides are original, and that the welder had a lapse when buttoning up the passenger side - it's hard to imagine that Ford would stop the production line to correct such a minor fault.

3. The underside of both platforms were the same - some minor surface rust and virtually no over spray, apart from what I put there myself when I painted the underside of the car..so, if the driver side is original, then the passenger side is too.

Here's a photo of both sides after the driver side platform was refitted:

So time to weld the platforms back in? Well, hold on, not so fast, there are a couple more things to do before we get to that. Firstly there's the support beams: Since I re-sized the platforms, the supports are now too big to fit underneath, which leaves several options:
- put the platforms back without the supports, after all it seemed to work for Mustangs Plus.
- fabricate some alternative supporting structure that would fit, or
- modify the supports so they would fit into the space available
 |
| A bit too big! |
First of all I turned the support around front to back, so now one end was OK. I then chopped part of the excess length off of the high end with a cutting wheel and bent the edges to the correct angle to meet the floor pan.

Next I measured how much of the support was still standing proud by using a piece of tape...

After using the tape to make some marks, I added another quarter of an inch an used another piece of tape as a guide for the cutting wheel.

The second cut was made at the upper edge just below the fold, so that a triangular shaped piece was removed.

Here's the view after both sides have been cut out:

And now for the BIG MOMENT...time to fire up my new MIG welder. First though, a few comments on why I bought this particular machine. I've been going back on fourth on whether to buy a welder for ages, and there were some valid reasons why not. I only have 110 V available in my garage, so I couldn't buy a really big machine, and with my bodywork being in mostly fantastic shape, I don't have that much need for a welder...but...there are some things that just can't be done without one, and I feel like it is the kind of tool which will be used a lot once it becomes part of the workshop. So, I took the plunge and wrote a note to Santa. Going against the advice from a couple of the guys in BAMA to buy a big budget Miller or Lincoln, I settled on the Eastwood 135 - apart from the excellent review on the Eastwood site, Larry Lyles says it's great, and so does James Bondo, so that's good enough for me.
 |
| My new welding set up with added gas tank |
The last time I did any welding was almost 20 years ago (OMG I am SO OLD!), and that wasn't even MIG, so I had a quick practice first on some scrap material first. It took a little bit of trial and error to get the wire speed and heat settings sorted out, but I was ready to move onto the platform support very quickly. After bending the piece into shape, I put down a couple of small tack welds...

...and then checked the fit with a piece of cardboard - a blind man would be pleased to see it, as my father used to say.

Then it was back out for "proper" welding up...
I laid down some beads on the inside too - this was probably overkill, but it was great practice and I was really enjoying my self-darkening helmet - this item was no where in sight (!) back when I learned to weld, and I can't imagine how I managed without it. I celebrated by taking the small old style mask that also came with the welder...and throwing it in the trash!

Here's the support after I cleaned up with the angle grinder - MIG welding certainly makes a LOT less mess than the old stick machine I used back in the day.

This is the comparison with the unadulterated support from the driver side (top) and my modified piece (below):
 |
| Then, and now... |
I then tack welded the
support onto the seat platform and tested the fit inside the car - it
was great, so I moved onto the driver side support. The welding was MUCH better this time round, in fact I considered smartening up the first piece...and then I remembered where these parts go, so I decided not to bother! Finally I gave both modified supports a quick going over with the wire wheel in preparation for painting.


Next I taped off the area where the welds will join the platform to the support, and painted the area under the support with a thick coat of Zero Rust which I applied with a brush.

The underside of the support also got a coat of Zero Rust, apart from where it will be welded. It would have been easier to use weld-through primer, but I couldn't find any locally, and didn't want to wait to have it shipped; also I'm not really sure how much corrosion protection it provides versus Zero Rust.

After the paint was dry I plug welded the platform to the support. My welding was a bit messy, but it seemed to be strong enough (I hope!).

The finally preparation of the platform was to weld back the support brackets that I previously drilled out.

Then, after checking the fit one last time, I painted the rest of the underside with Zero Rust.

The area of the floor pan that will be covered by the seat platforms was also treated to a coat of Zero Rust, and then everything was left overnight to dry.

The next day I started welding the platforms back into the car. I've often wondered what the access holes in the floor pan are actually intended for - they're not drain holes - but they certainly came in handy for clamping the platforms in place before the first few welds.

I was really pleased with the welds at the transmission tunnel, as I managed to get them done without burning holes through the sheet metal.

After completing the welding on all four edges I gave the perimeter a good going over with the sanding disc and then the wire wheel to clean up ready for paint.

And the same on the other side. The amount of welding was probably overkill, but I was enjoying the practice so I just carried on going. I must say that this is a great place to practice welding, because it will never been seen once the car is finished.

Awesome work on those reinforcements and lowering your seat pedestals. This will be a great reference for anybody who's thinking of doing it.
ReplyDeleteOh and congrats on your new welder!!
ReplyDeleteAh yes! Brilliant work there and great reference material! Any idea who makes the welder for Eastwood?
ReplyDeleteGreat job! I'm happy with my MIG135. Does a great job, I got the cart also from Eastwoods. The adjustable controls are a huge help since they do not have a click dial. I don't know who makes the welders for Eastwoods, I don't see any stickers that say made in China.
ReplyDeleteLooks like Eastwood designed the welder in-house. Check out this thread: http://www.hotrodders.com/forum/eastwood-welders-173865.html especially the post by "Matt@Eastwood".
ReplyDeleteAn exerpt from the post: "-These welders we designed and tested in house here at Eastwood. They were designed to be EQUIVALENT to the Lincoln Mig Pak 10 (our 135) and the Mig Pak 15 (our 175). "