 |
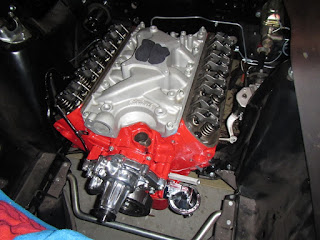
| Not too shabby |
Next up: the radiator. This how it looked in about 2012 when I acquired it from one of my mates in BAMA. I think it was painted either at the last garage or at the Green Room along with most of the other black engine parts.
I have a custom overflow bottle which I painted at the same time along with the side panels which help attach the radiator to the car.
This is how the radiator looked after installation. I had to take it back out later on to do the wiring...
I may have mentioned earlier that step-by-step photos just don't exist for much of this period, and anyway, most of it was just bolting on shinny new parts that had been sitting in their boxes for a year or more.
 |
| bolted on the mini starter |
 |
| mounted the electronic ignition box at the driver side fender apron |
 |
| harmonic balancer with 4-bolt pattern |
 |
| one of two inline fuel filters |
I had decided to replace the original clutch linkage with a cable. Thankfully for a novice like me, the guys at Modern Driveline have produced a kit which makes it very easy to marry up the cable with the original zinc-plated clutch pedal and my modern Tremec T5 transmission. I also got a replacement speedometer cable at the same time, and I had the gears setup for the 3.40:1 differential.
Installing the kit was easy. The only issue was that I had to remove the master cylinder and disconnect the push rod before I could install the supporting plate. Installing the speedometer cable was a bit more involved. The first one I tried was about a foot too long, so I had to get a replacement, and I had to take the instrument cluster out twice. This was all too tedious to photograph.
This is how the distribution block and proportioning valve looked after the master cylinder was re-installed and the brake system bled....again....
I used a welding rod to figure out the ideal shifter stick position, and then ordered the nearest I could get from Summit.
This is how it looked with my custom handle installed ;)


No comments:
Post a Comment