Now then, now then: if you're going to drive around in a vintage car, then you have to accept some compromises on safety. I'm fortunate that 68 was the first year that ford replaced the "spear" steering column with a collapsible design and made a number of other modifications to improve safety, such as the rear side marker lights. In addition I've made my own improvements such as the SSBC brakes and 3-point seat belts (see below).
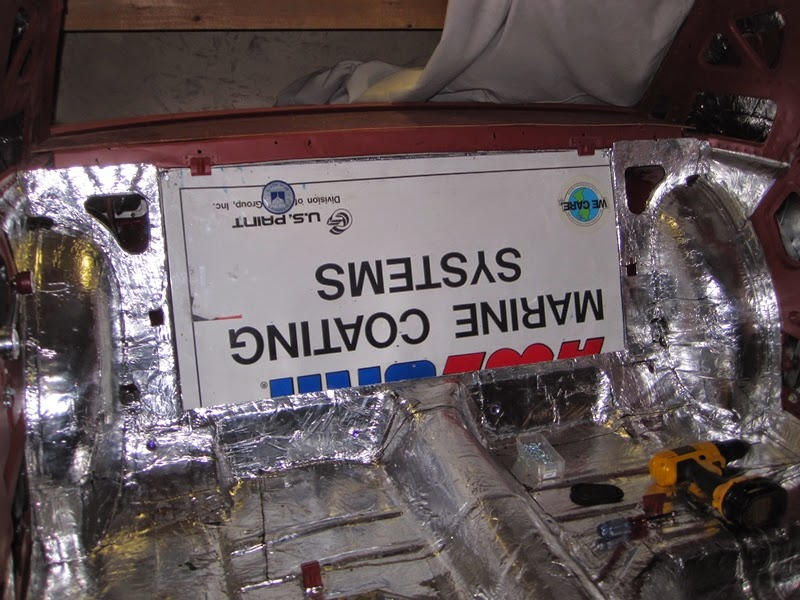
Given what we know about gasoline, it's always surprised me that the gas tank (also known as the trunk floor) is separated from the passenger compartment by nothing more than a flimsy sheet of cardboard and the rear seat back. A common modification among the guys in BAMA is to install a steel or aluminum sheet instead. I followed this path after my buddy Chuck acquired a suitable obsolete steel sign, which I trimmed, covered with faux-dynamat at the trunk side, and installed with sheet metal screws.
 |
| Much safer! |
Absolutely forever ago (when I had the old garage set up as a paint booth) the rear seat side panels were stripped down, and repainted. I had to remove some light surface rust on the inside, and I scrubbed off all the remnants of the old foam sound insulation.
After painting, thick foam insulation was glued onto the insides of the panels with the 3M yellow weatherstrip adhesive (but not photographed) and the Kraft vapor barriers installed using windshield caulk to provide a seal. To be honest it was really hard to squirt sticky black paste over my beautiful car...but I found a way. After the panels were installed I attached the window winders, and tested the quarter windows....and applied my BAMA decal in the passenger quarter window.
Another improved safety feature of the 68 over the earlier cars was shoulder belts as well as lap belts for the front seats. This means that installing 3-point seat belts in a 68 is a good deal easier than in the preceding cars because the upper mounting point is already there. I actually purchased the seat belt kit more than two years ago, because I wanted to test all the mounting points before I put away the welder.
After I Moved to the present garage I found the seat belts while looking for something else, so I took ten minutes out to installed them. The lap belts in the rear seat are for show. This will be a two-seater car when it's on the road.


That looks really, really nice! After seeing your paint match and gloss with the seat, it gives me hope I can get mine to look as good.
ReplyDeleteThx! I'm sure you can get yours looking great :)
ReplyDelete