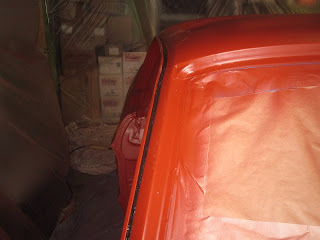
So after two full days of filling and sanding, I was ready to paint....or should I say ready to start preparing to paint. The first thing to do was try and rid the garage of all the dust I produced while sanding body filler. This actually took a lot of effort. I swept up the worst of it, but there's only so much you can do with a broom, so I got the compressor going and blew everything towards the door and out into the world (it's only dust, right?), and finished up by wetting down the floor and sweeping again.
Great, onto the car itself. I gave the bodywork a thorough wipe down with shop towels soaked in denatured alcohol. Then I broke out the masking paper and tape and got stuck in. I masked off the trunk and the window and door openings first, and then covered up everything forward of the firewall which I already painted with epoxy primer.
Ok, so getting to the end of day three now, but at least I'm ready to spray the primer. I had just enough epoxy leftover from the engine compartment, but I didn't plan on my paint gun breaking down about three quarters of the way through. This was a major PITA, as I was forced to complete the job with a touch up gun, and it shows, particularly in the second picture below. Fortunately it doesn't really matter, because I'll be doing a bunch more sanding of the car anyway, but it's still annoying.
Last day: I began by applying seam sealer to the drip rails - I didn't take pictures but I used a lot of masking tape while I was doing this and it was well worth it as the process is really messy. After the sealer had time to dry I covered it up with a coat of epoxy using the now-more-appropriate touch-up gun.
While the primer was drying I went over to a buddy's house to pick up a substitute paint gun - one a good deal better than the cheap piece of tat I started with - and then I started preparing for the final part of my block sanding vacation: clear coating the underside of the car.
There has been much discussion on VMF recently about the wisdom of painting urethane clear coat directly over epoxy primer; the reasons for not doing so include:
1. The paint manufacturer does not recommend doing so without the appropriate layer of base coat in between.
2. Clear coat is not as tough as the primer, so the surface will actually be more prone to damage from flying stop chips, road debris etc.
3. The shinny appearance isn't concours correct.
4. One of the purposes of clear coat is to add UV protection, but you don't really need that under the car.
All of these points have their own merits, and you can add to the list that it's costly and time consuming...but then isn't everything, so I came up with my own list of reasons for doing it anyway:
1. The key to paint compatibility is really to do with surface preparation and application, plus I don't think that base coat and clear coat are chemically all that different, they're both urethanes, so that's point one dealt with provided I scuff up the existing primer to give the surface some "tooth".
2. Clear coat may well be easier to scratch than primer, but it still provides additional protection to the metal underneath - you can't scratch primer at all if it's covered with something else, can you.
3. Nothing on my car has been done to make it "correct" because I couldn't care less about concours requirements; I'm building the car I want.
4. I happen to like the look of shinny stuff more that dull, so that's that.
Here's the masked off look:
And here's how the underside came out after the clear coat dried: all nice and shinny!


Holy cow! I am sooooo afraid to ask how in the heck you managed to clear the bottom with the car on jack stands! I gurantee I'd have more clear on my belly than on the car! Great job!
ReplyDeleteBreak out the floor mirrors - you'll want to make sure everyone appreciates that effort!
ReplyDeleterj
That is impressive looking. Now you got me thinking of clear coating the underside of my fastback...that is whenever I get that far. However, I'll probably add some flattener to the clear since I'm going for a more matte finish "original" look. I agree with RJ. Get out the mirrors.
ReplyDelete