The other thing about this blog last year is that it was always several months behind. There is always some time lag between when stuff happened and when it gets written up, but in 2012 this was exception. For example, the last real work I did on the car was painting the inside of the trunk and that was actually accomplished in November 2011...although it didn't make it into this blog until the following July! As it happens, the work described in the post you're about to read (if you plod on, that is...) was actually accomplished last Labor Day weekend, and that was pretty much the last vacation day I had until the Christmas break.
So....lighting up, so to speak. When I took over my garage it came equipped with three 110V outlets and a pair of incandescent light bulbs. It wasn't really good enough for moving boxes, never mind high class auto restoration. Or even the work I do come to think of it.
 |
| only a little better than the black hole of Calcutta |
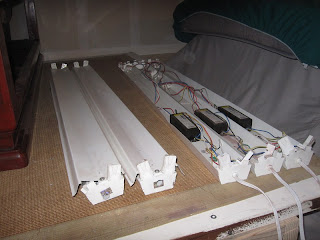
Fortunately I already own a bunch of fluorescent lights and all the related conduit, cable and fittings etc....and this is in fact the third garage/workshop in which they have been installed.
 |
| Every light installed is one less thing to store |
 |
| Had to stand/lie on the platform I built over the car to hang these lights |
 |
| After photo |
 |
| three more at the "business end" |
While this was going on I had to move the car away from the side wall, which isn't easy when there's not much space to go forward or back. The easy solution would be to buy a set of car skates, but I need to do it right there and then, and since the car is still devoid of a motor, I figured I could do it with the floor jack. This is easy at the rear, where I used a piece of 2 x 6 under the third member, but more difficult at the front where I only had the X-member to lift (white arrow).
To help, I made a custom lift block out of a piece of 4x4. On the underside I drilled some holes and worked them into a pair of curved slots with a half inch chisel: the slots go over the lifting pad on the floor jack and stop the block from sliding on the jack. You can figure out exactly where to cut the slots by putting the block on top of the jack and hitting it with a BFH.
Then I cut a slot the same width as the X-member on the opposite side of the block. The slot is deliberately offset so that the X-member (and all the weight) is shifted a little bit behind the jack's front wheels. So, raise the car until the wheels are about an inch of the ground and push sideways about six inches. Then the same at the back. And rinse and repeat etc.Stay tuned for some "real" car stuff coming up :)


Thanks for the update Ian. Your future is looking bright (as is your garage)! Good idea on the floor jack fixture.
ReplyDeleteThe work will start progressing again in no time. Keep it moving at the speed of light!
ReplyDeleteGood update Ian. I can't imagine setting up and tearing down a garage space, not to mention moving your Mustang as many times as you have. You should win the Mustang restoration perseverance award! Looking forward to the next post.
ReplyDelete