Most of the exposed metal on the underside looked like this before I got started:
I have heard and read quite a lot about which techniques to use. I tried a wire wheel on my electric drill to start with, and while this is a useful tool in places, it doesn't really cut it with the heavier rust. My preferred method is a heavy wire wheel on my five inch angle grinder. This is noisy, but it does the business.
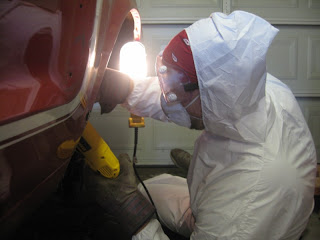
I've done a bit of welding and fabricating in the past and I'm used to working with an angle grinder in odd positions. It's really just a question of trying to get as comfortable as possible while dodging the sparks. I'm not sure what I'm going to do with the tight areas yet...
There was a real mixture of gunk in the wheel arches: sound deadener, seam sealer, dirt, grot - you name it; part of the well was even covered with a layer of black paint.
I let this crud have it big time with the wire wheel...and there was good metal lurking just below the surface.
There is no question that this is a dirty job. Hell, I'm just waiting for Mike Rowe to come round and profile me. Some folks have suggested using a heat gun to soften this material before scraping it off, and I might try that in the future. If you're going to use a wire wheel then a face mask or respirator, eye protection and a pair of thick gloves is the minimum requirement.
This makes a heck of a lot of dust. The picture below was taken quite early on and the shop floor is already thick with dust. I've heard time and again about how awful this task is....but really it's not that bad once you get going.
There was good metal all along the rear driver side frame rail (nice!).
In one session I got the front half of the driver side rear wheel arch cleaned out I didn't find anything more than surface rust. That's the good news...the bad news is I figured out how long this part of the project is going to take.....I think this is why restorations go on for years.


I wish my wheel wells looked that good!
ReplyDeleteKeep up the great work!