Often when I work on my car I'll get a window of a few hours or so to really get stuck into the project, but just lately I've been working in shorter bursts. For one thing, wire wheeling on the underside of the car is not a task that lends itself to over indulgence: it's hot, dirty, uncomfortable and tiring work. It is also very noisy, so I have been trying to appease my nearest and dearest by applying my father's adage when working with a wood carving chisel, namely "little and often."
Finally by last weekend I had cleaned up most of the floor pan areas and it was time to move on to the transition panel and the underside of the trunk and rear quarters. This area was covered with muck including some sound deadener, although thankfully not as much as under the wheel arches.
In order to get better access to these areas, I had to remove the rear suspension and the rear axle. I had really been putting this off, because the absence of these parts means I won't be moving the car out of the garage any time soon. This shouldn't really be an issue, because the car has barely been out of the garage for more than a few hours at a time since I brought it home from Kansas...but nevertheless it was a milestone in this project. The guys in BAMA have warned me about "keeping the car rolling" for as long as possible, but those days are over for this project now. The car was already on stands, but I raised it just a tiny bit with the floor jack under the differential until I could squeeze an extra set of jack stands under the rear axle.
When I let the car down, the rear axle was fractionally above the blue stands, and the forward stands were taking all the weight of the car. I've never done anything this "big" on a car before, and I was super nervous about hurting myself, or worse - dropping the axle or the drive shaft. So, as another security measure I put the rear wheels back on - this only took a few minutes and now I had a pair of jack stands to catch the axle if I was to fall like an inch to the floor.
Before you disconnect the drive shaft it is a smart move to mark the relationship between the shaft, the yoke, and the differential. The best way to do this is with a punch, because it isn't going to rub off! I am intending to upgrade the rear axle, but I still did my best to mark the set up, just in case...
It is then a simple task to remove the two small u-bolts which hold the drive shaft into the yoke. I was able to get these undone quite easily.
Of course it is very important not to drop the drive shaft - I rested this one on a special stand (aka a cardboard box) while I removed the suspension.
Getting the nuts off the u-bolts which hold the rear axle to the leaf springs was really tough - the thread on the u-bolts was so rusted that the nuts never became loose; I had to crank all eight nuts round and round for eternity. I was so worked up while doing this that I forgot to take my usual photos. Once the u-bolts are out of the way, the rear shackles can be undone. All these fittings will be replaced and I will be getting polyurethane bushings to go with my new suspension.
I dropped both leaf springs at the rear, and the axle was left resting on the stands. I was actually able to lift it off the stands quite easily and roll it out of the way. Anyone looking for a 4-lug ford rear end? I know where one is, it just needs a bit (a lot!) of cleaning up!
A couple more bolts to undo and then the leaf springs are off and out of the way...well actually they're right in the way - taking up valuable space in my shop! I will probably have to scrap these at some point as I can't envisage being able to sell them. I pulled the drive shaft out and covered over the transmission seal. I was expecting the seal to leak a bit, but it didn't. I don't know if this is good or bad. The transmission and motor are staying in for now as I have nowhere to store them.
The back of my car looks really bare now. At least there is some shinny metal under there...and lots more stuff to grind off. Great. I guess I'd better get back at it.....
Wednesday, July 28, 2010
Sunday, July 25, 2010
undercarriage part one
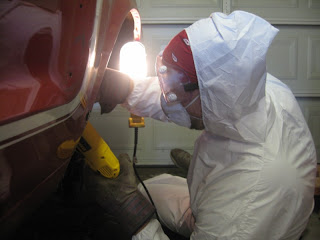
Cleaning the wheel wells was pretty grim all told. I ended up wearing so much protective gear that just getting into position was tough...and this was just the wheel wells! I found out the hard way that a pair of goggles over my eyes was not sufficient protection - the dust just gets everywhere. I wound up wearing a full face mask and goggles over my prescription glasses - yes, three layers of protection! This saved me from anymore eye problems, but it made it very difficult to actually see what I was doing...the solution was to use a very bright work light, and keep re-directing it onto the exact spot I was working on. I kept dropping the light or bashing it on something (under side of the car, jack stand etc..) which meant I went through a ton of light bulbs. Not very green, but then what exactly is green about a gas-guzzling pony car? I did try using a rechargeable LED work light, but it wasn't even close to bright enough.
Onto the underside of the car: most of the underside was covered in a thick gunky residue - the legacy of driving 2000 miles through the desert with a major oil leak (note: this story will eventually be documented elsewhere on my blog, but the salient facts are that I drove the car a long way with leaking oil pan and valve cover gaskets - I was putting in a pint of oil every time I stopped for gas!).
Like the wheel wells, the PO had sprayed part of the underside with black paint at some point, probably to tart up the car before it was sold to me. There was obviously no time to take off the fuel lines before the paint was applied:
I attacked the underside with a wire brush and some shop towels, but this didn't really make much of an impression.
Wiping on lacquer thinner with a shop towel was more effective, and I got the worst of the oil and crud off the underside this way. The original red oxide primer was mostly intact underneath.
The wire brush worked better towards the rear where there was a lower ratio of oil to dirt.
Several sessions into the underside cleanup and it became obvious that the exhaust was going to have to go sooner rather than later. I had been hesitant to remove the exhaust up to this point because it was going to require cutting the pipe somewhere in the middle to get it off the car. The fact is that reusing any parts from the exhaust is unlikely. To save it would have meant taking off the rear end and rear suspension, which I wasn't ready to do, so I just bit the bullet and broke out the cut-off wheel.
I wrapped the driveshaft up in polythene to keep it as clean as possible, and to deflect any stray contact with the wire wheel (that would be bad!), but the days before this gets taken out too are definitely numbered.
Really the only way to do this is to work on small sections. I started by going over an area pretty quickly to leave something like the picture below, where about 80% of the crud has been removed.
I then went back over the same patch more slowly, concentrating on specific ares until I had an approximately clear surface. There were some places that I just couldn't get to with a 4.5 inch wire wheel - I'm leaving these bits for later on when I can attack them with a more suitable sized implement, rather than constantly changing back and forth between different wheels.
I have so far completed a "first pass" over most of the floor pan apart from the transmission tunnel. The more I do, the easier this part of the project becomes, but I can fully understand why most restorers look on this task as the most uncomfortable part of the process. Next time I'm definitely getting a lift!
Sunday, July 11, 2010
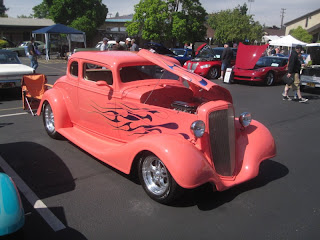
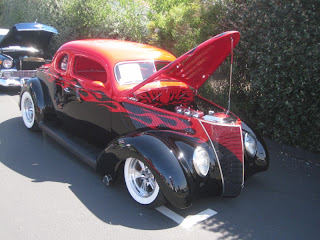
Redwood Chapel Car Show
I took Sam to the Redwood Chapel car show on Saturday...not
just mustangs this time, although a contingent from BAMA put on a good show. Overall there were some wonderful cars on display, including the following selection:
Friday, July 9, 2010
at last: bye-bye rust !!
The first phase of this project has been all about taking the car apart, cleaning and storing parts, and researching what changes I'm going to make before I put it all back again. It's mostly been fun, but a BIG milestone has been passed now that I've moved on to refurbing the car body. I started at the back in the lip below the trunk - there was quite a lot of surface rust in this area.
Most of the exposed metal on the underside looked like this before I got started:
I have heard and read quite a lot about which techniques to use. I tried a wire wheel on my electric drill to start with, and while this is a useful tool in places, it doesn't really cut it with the heavier rust. My preferred method is a heavy wire wheel on my five inch angle grinder. This is noisy, but it does the business.
I've done a bit of welding and fabricating in the past and I'm used to working with an angle grinder in odd positions. It's really just a question of trying to get as comfortable as possible while dodging the sparks. I'm not sure what I'm going to do with the tight areas yet...
There was a real mixture of gunk in the wheel arches: sound deadener, seam sealer, dirt, grot - you name it; part of the well was even covered with a layer of black paint.
I let this crud have it big time with the wire wheel...and there was good metal lurking just below the surface.
There is no question that this is a dirty job. Hell, I'm just waiting for Mike Rowe to come round and profile me. Some folks have suggested using a heat gun to soften this material before scraping it off, and I might try that in the future. If you're going to use a wire wheel then a face mask or respirator, eye protection and a pair of thick gloves is the minimum requirement.
This makes a heck of a lot of dust. The picture below was taken quite early on and the shop floor is already thick with dust. I've heard time and again about how awful this task is....but really it's not that bad once you get going.
There was good metal all along the rear driver side frame rail (nice!).
In one session I got the front half of the driver side rear wheel arch cleaned out I didn't find anything more than surface rust. That's the good news...the bad news is I figured out how long this part of the project is going to take.....I think this is why restorations go on for years.
Subscribe to:
Comments (Atom)


